Service Manual (KLZ1000C) — page 315 of 762
Wheels/Tires › Rear Wheel Removal
Text on this page
WHEELS/TIRES 10-7
Wheels (Rims)

• Apply  high-temperature grease to the grease seal lips.
•○The collars
  Fit the collars [A] on the both sides of the hub.
               are identical.

• Apply a thin coat of grease [A] to the front axle [B] for rust
  prevention.
   About 10 mm (0.4 in.) [C]
   About 30 mm (1.2 in.) [D]
                             NOTE
  ○Do not apply grease to the threads of the axle.
• Insert the front axle.
• Tighten:
  Torque - Front Axle: 130 N·m (13.3 kgf·m, 95.9 ft·lb)

• Before  tightening the axle clamp bolt [A] on the right front
  fork leg, pump the front fork up and down 4 or 5 times to
  allow the right front fork leg to seat on the front axle.
                             NOTE
  ○Put a block in front of the front wheel to stop moving.
• Tighten:
  Torque - Front Axle Clamp Bolt: 20 N·m (2.0 kgf·m, 15 ft·lb)
• Install the removed parts.
• Inspection(2-41)).
  Check   the front brake effectiveness (see Brake Operation

                           WARNING
  After servicing, it takes several applications of the
  brake lever before the brake pads contact the disc,
  which could result in increased stopping distance
  and cause an accident resulting in injury or death.
  Do not attempt to ride the motorcycle until a firm
  brake lever is obtained by pumping the lever until
  the pads are against the disc.

Rear Wheel Removal
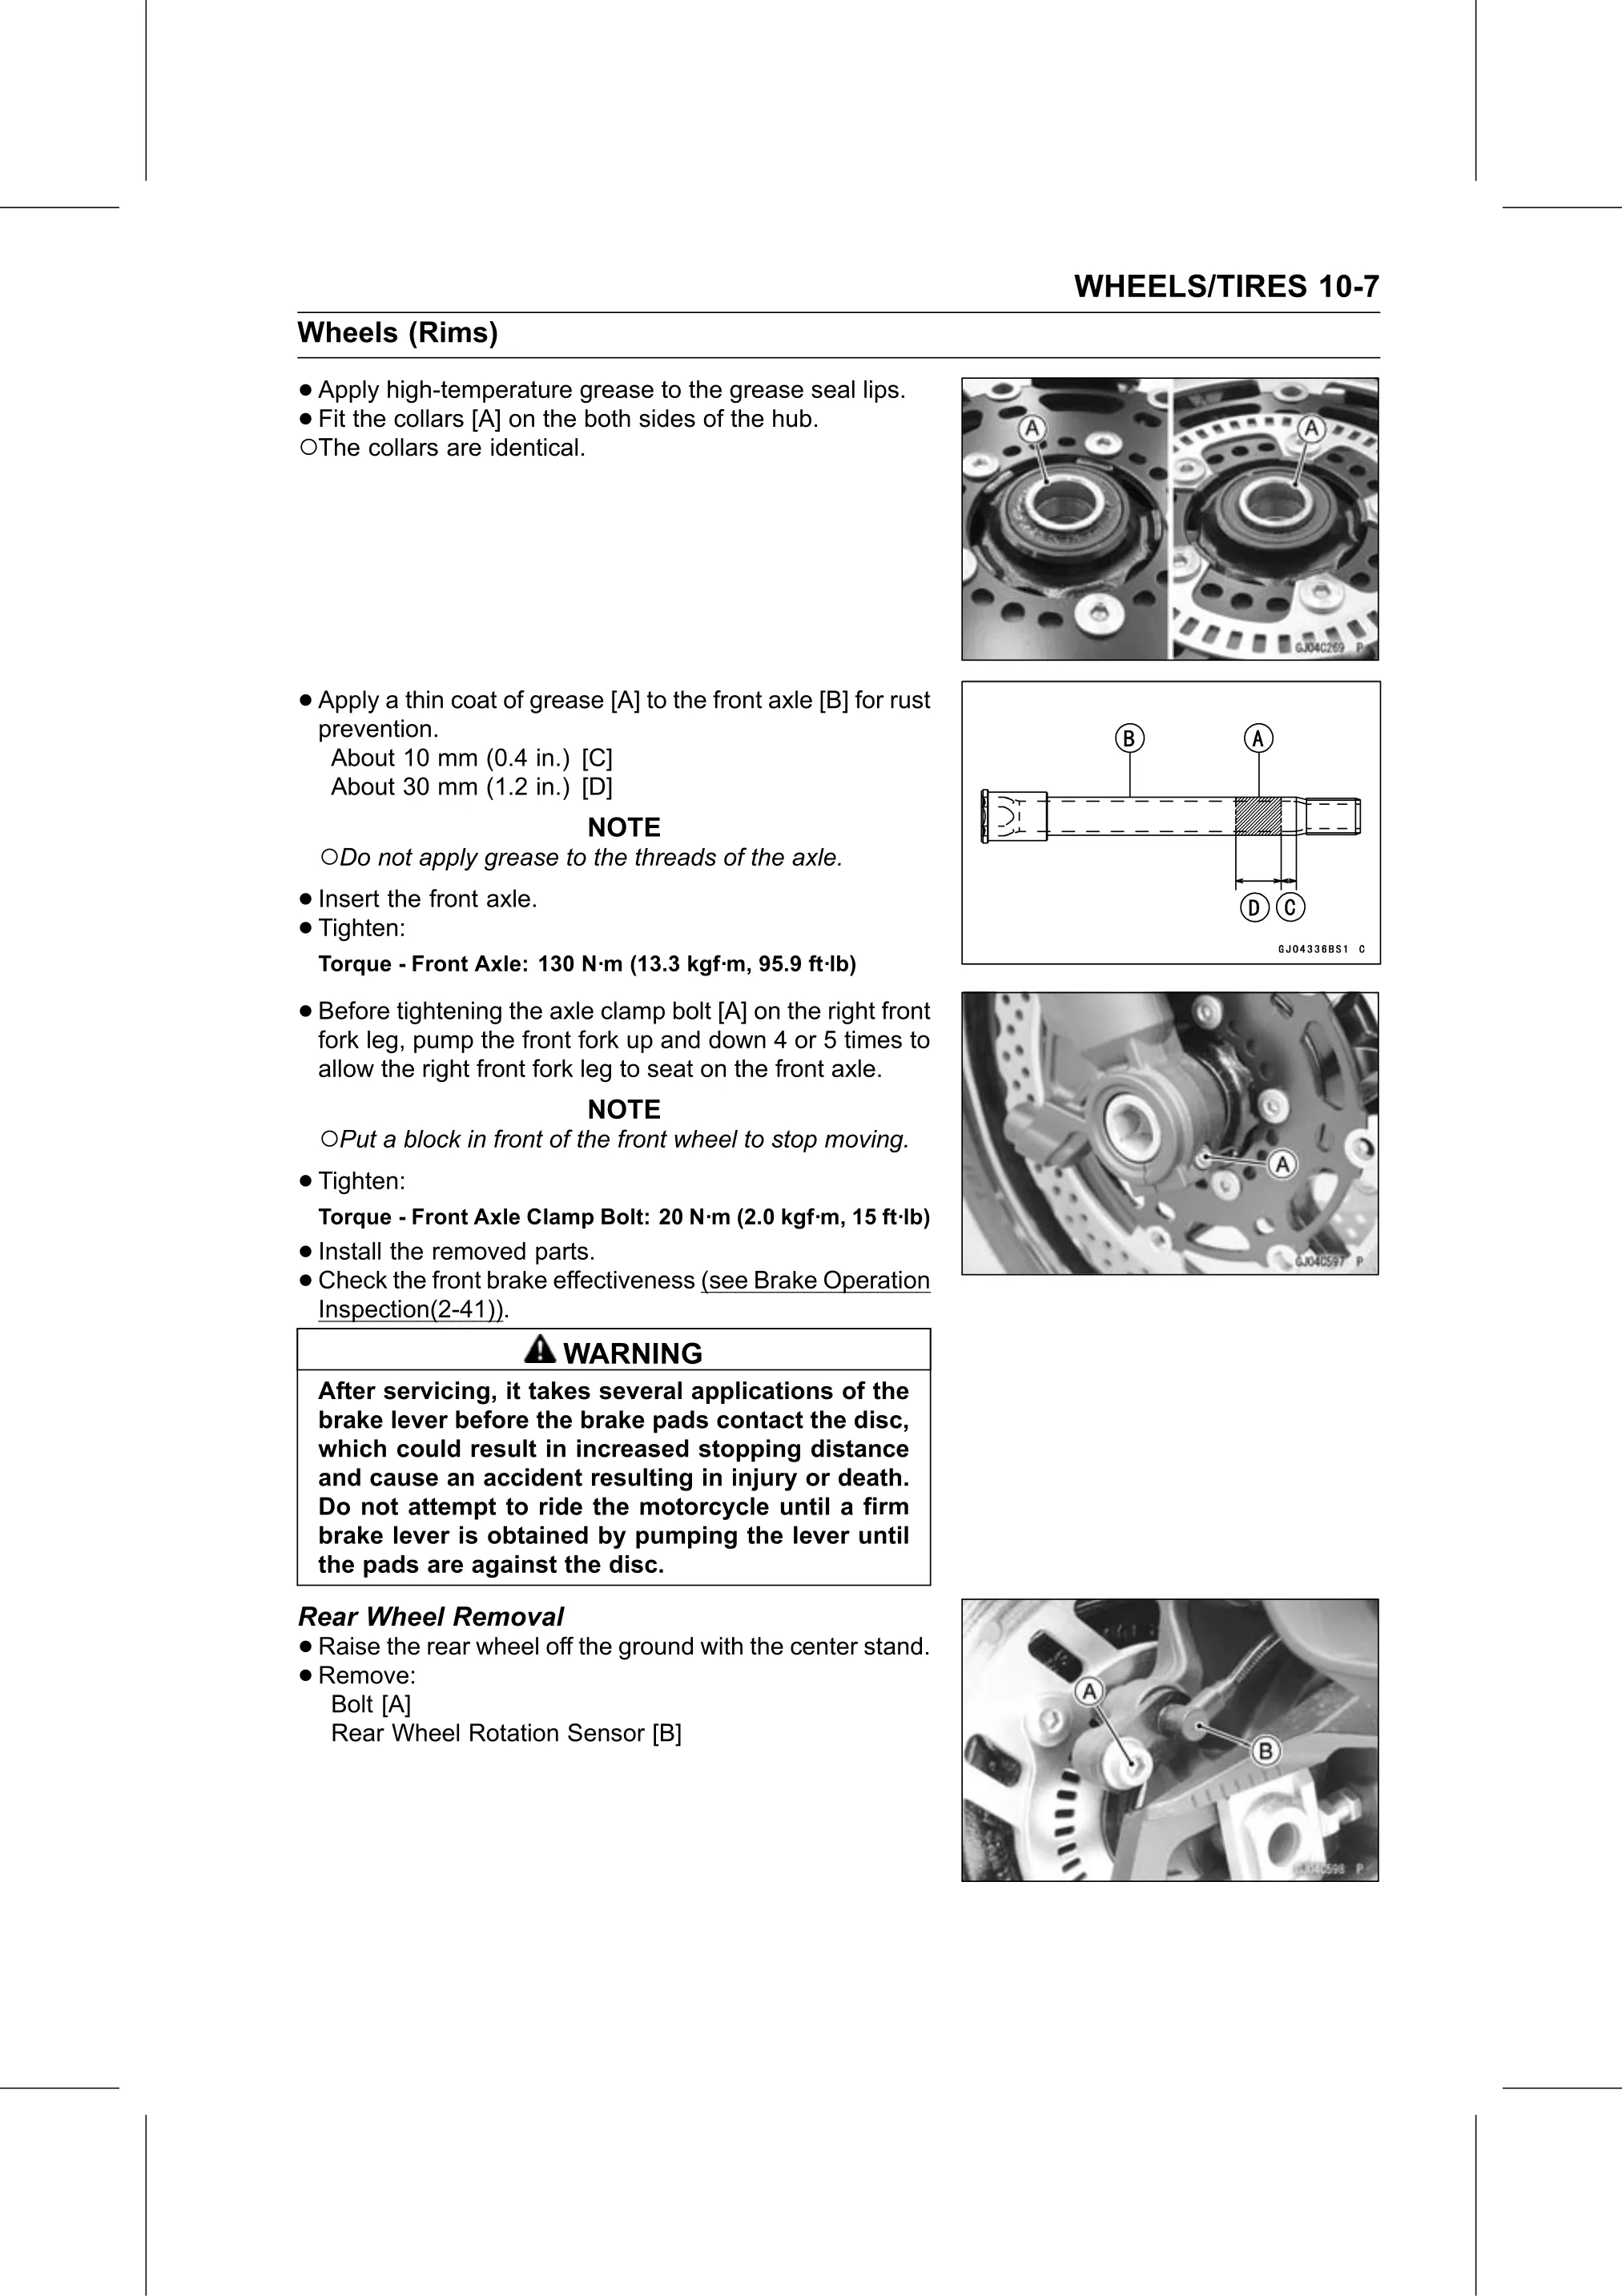
• Raise  the rear wheel off the ground with the center stand.
• Remove:
   Bolt [A]
   Rear Wheel Rotation Sensor [B]