Service Manual (KLZ1000C) — page 626 of 762
Self-Diagnosis System › Intake Air Pressure Sensor #1 Output Voltage Inspection
Text on this page
17-24 SELF-DIAGNOSIS SYSTEM
Intake Air Pressure Sensor #1 (Service Code 12) (DTC P0105, P0107)
Intake Air Pressure Sensor #1 Output Voltage
Inspection
• Measure the output voltage at the intake air pressure sen-
sor in the same way as input voltage inspection, note the
following.
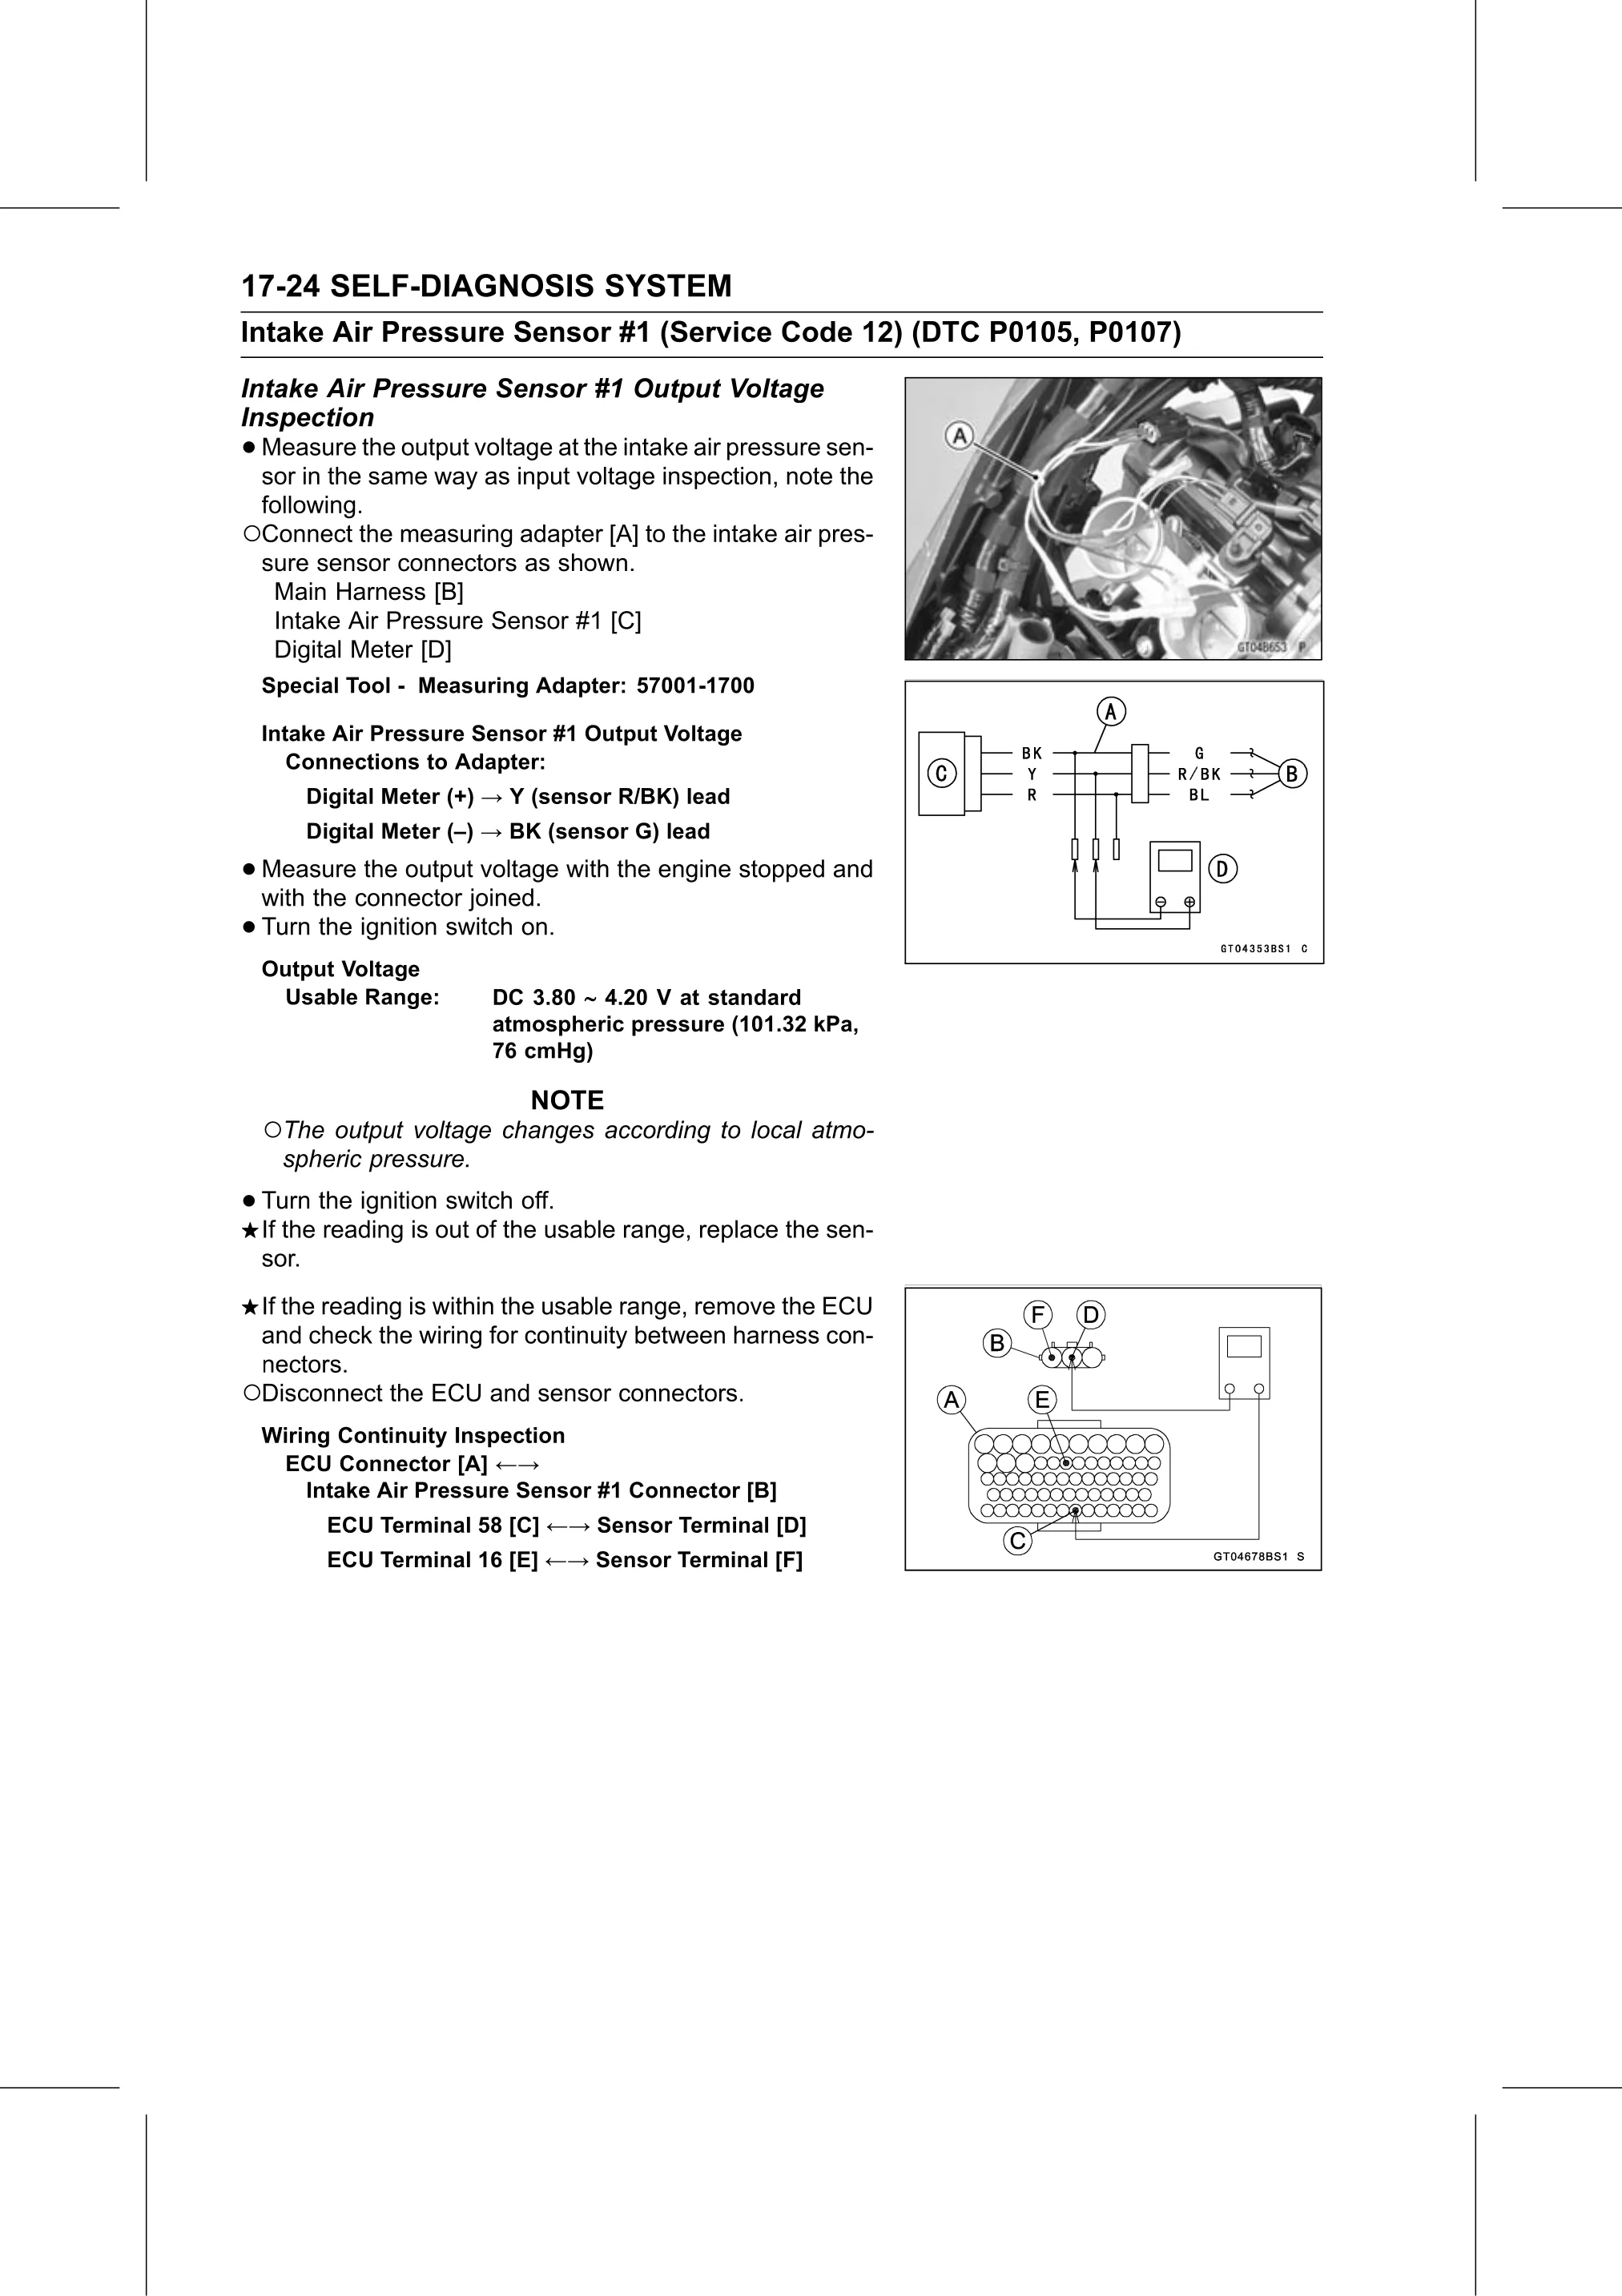
○Connect the measuring adapter [A] to the intake air pres-
sure sensor connectors as shown.
Main Harness [B]
Intake Air Pressure Sensor #1 [C]
Digital Meter [D]
Special Tool - Measuring Adapter: 57001-1700
Intake Air Pressure Sensor #1 Output Voltage
Connections to Adapter:
Digital Meter (+) → Y (sensor R/BK) lead
Digital Meter (–) → BK (sensor G) lead
• Measure the output voltage with the engine stopped and
with the connector joined.
• Turn the ignition switch on.
Output Voltage
Usable Range: DC 3.80 4.20 V at standard
atmospheric pressure (101.32 kPa,
76 cmHg)
NOTE
○The output voltage changes according to local atmo-
spheric pressure.
• Turn the ignition switch off.
If the reading is out of the usable range, replace the sen-
sor.
If the reading is within the usable range, remove the ECU
and check the wiring for continuity between harness con-
nectors.
○Disconnect the ECU and sensor connectors.
Wiring Continuity Inspection
ECU Connector [A] ←→
Intake Air Pressure Sensor #1 Connector [B]
ECU Terminal 58 [C] ←→ Sensor Terminal [D]
ECU Terminal 16 [E] ←→ Sensor Terminal [F]