Service Manual — page 62 of 715
Periodic Maintenance › Drive Chain Slack Adjustment
Text on this page
2-40 PERIODIC MAINTENANCE
Periodic Maintenance Procedures
Drive Chain Slack Inspection
                               NOTE
    ○Check the slack with the motorcycle setting on its side
     stand.
    ○Clean the chain if it is dirty, and lubricate it if it appears
     dry.

• Check
  tion).
          the wheel alignment (see Wheel Alignment Inspec-

• Rotate   the rear wheel to find the position where the chain
  is tightest.
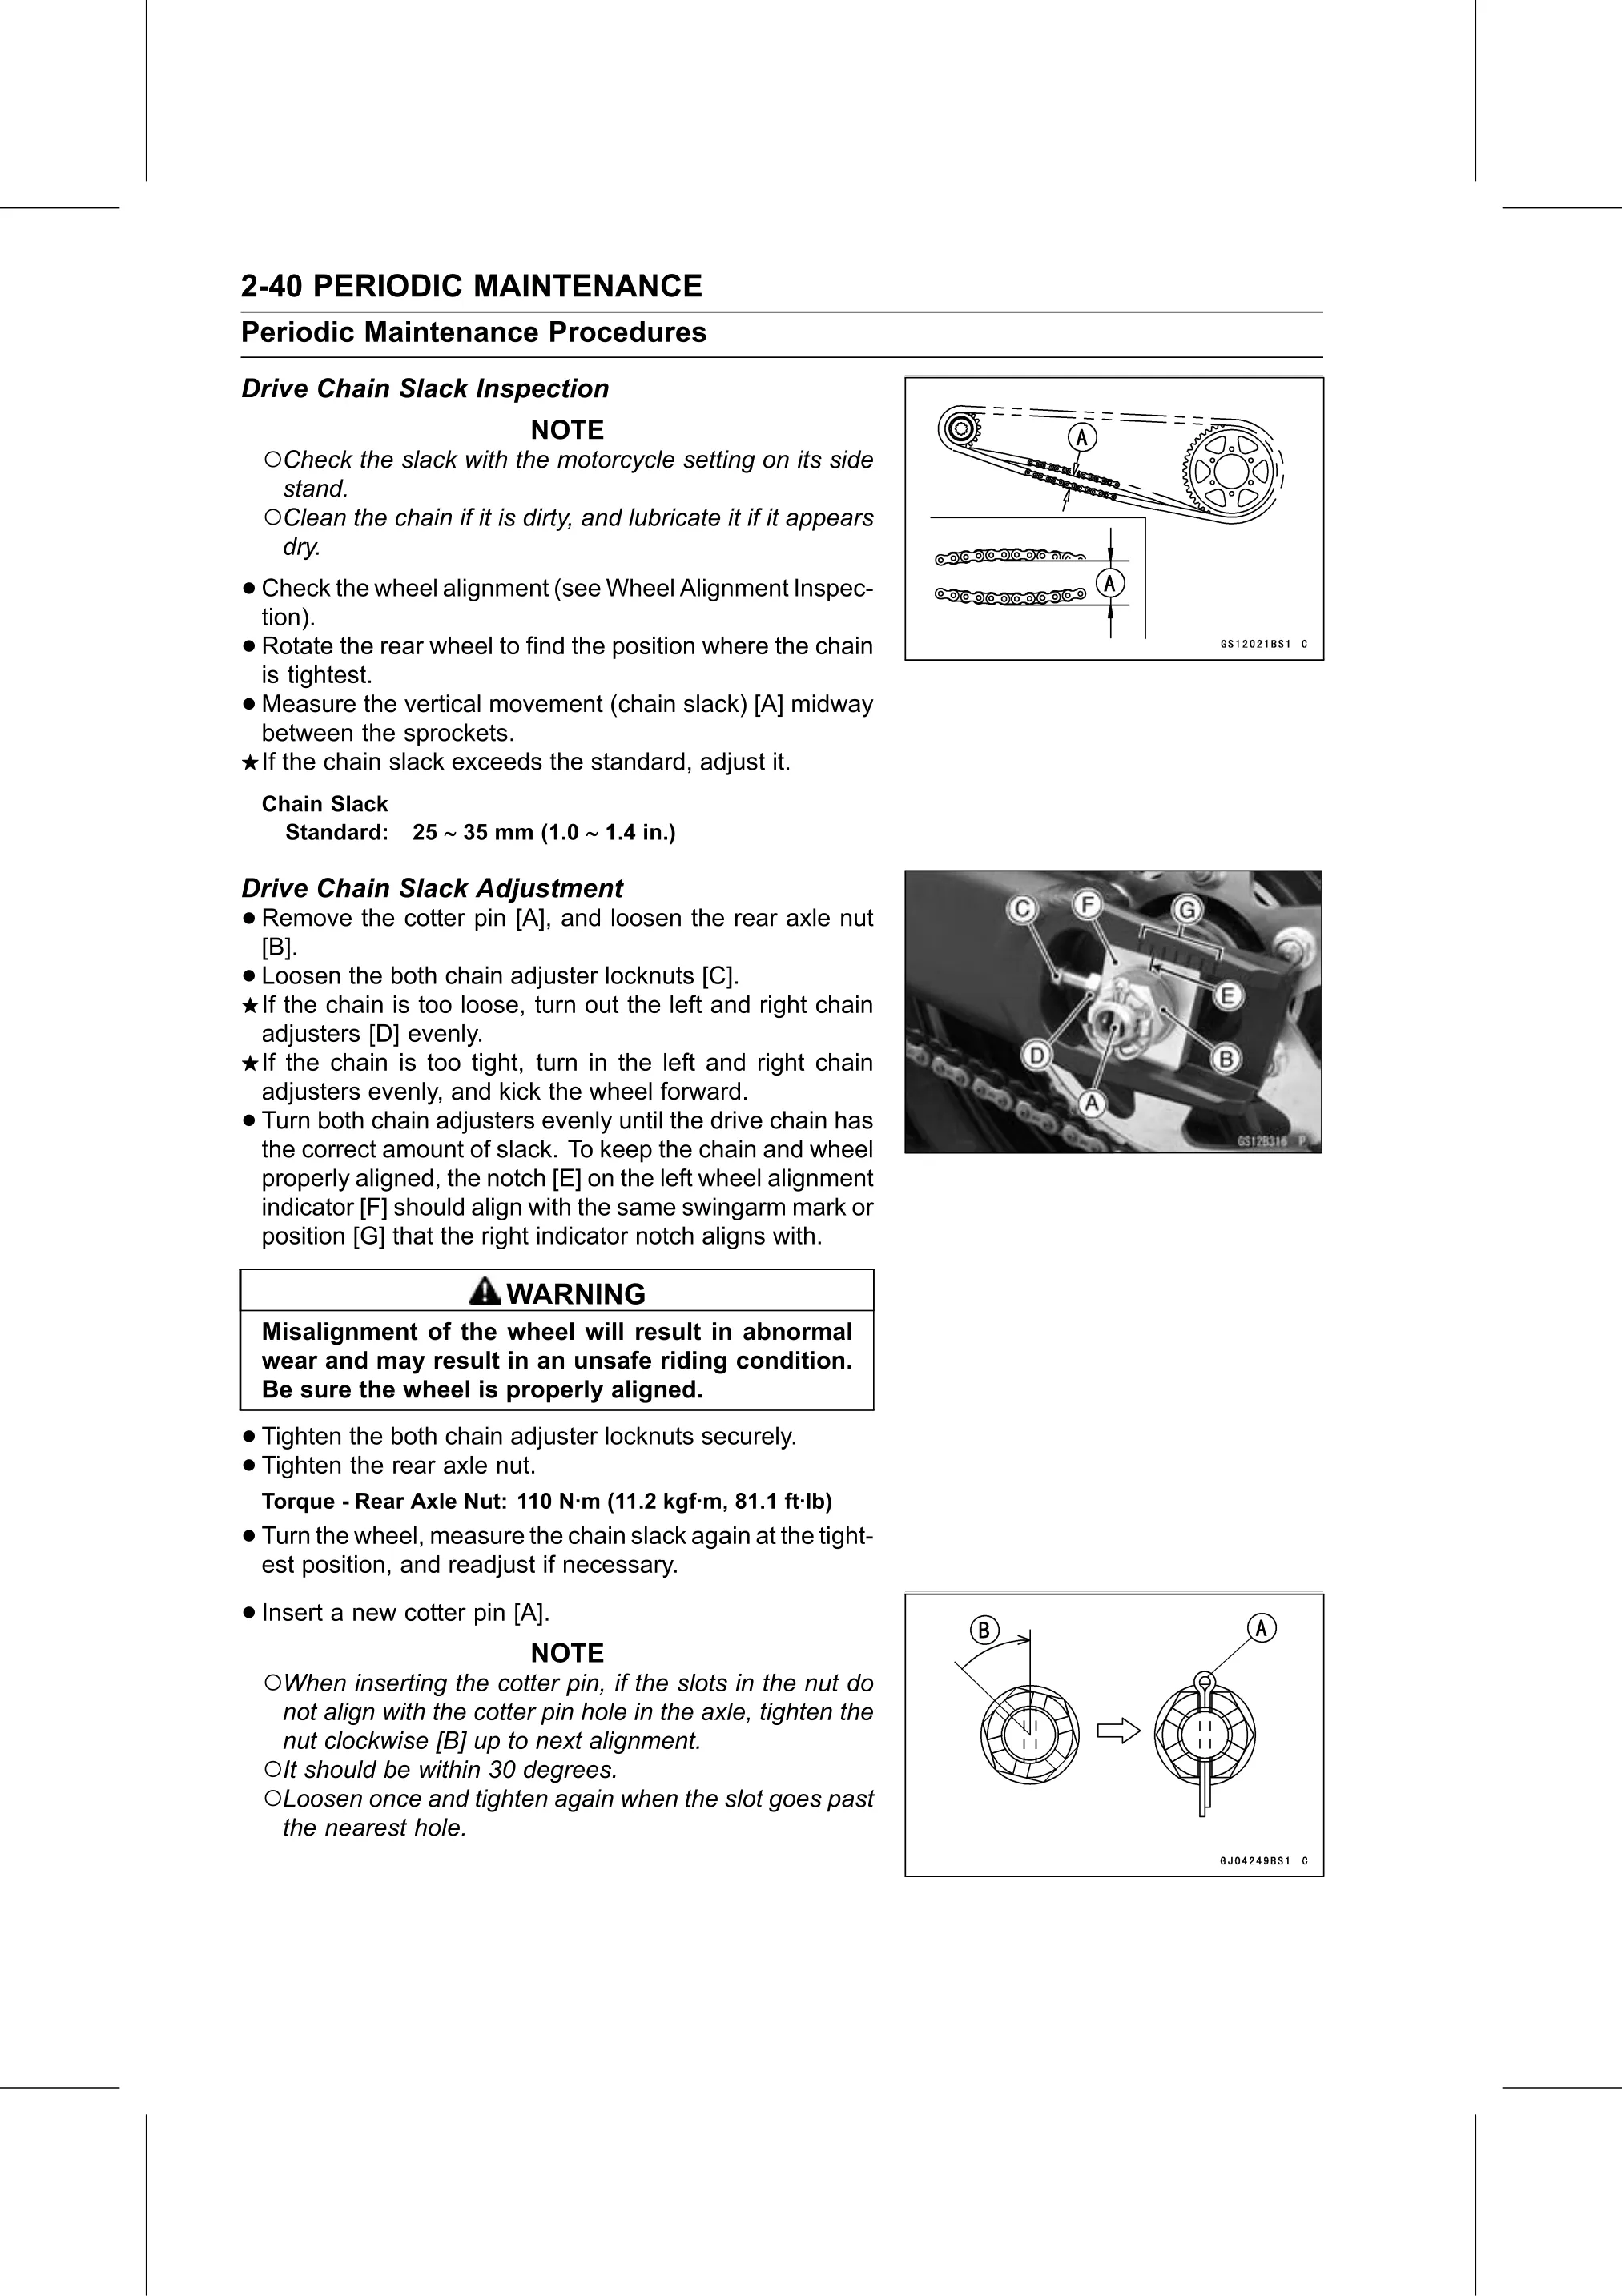
• Measure    the vertical movement (chain slack) [A] midway
  between the sprockets.
    If the chain slack exceeds the standard, adjust it.
    Chain Slack
      Standard:    25 ∼ 35 mm (1.0 ∼ 1.4 in.)

Drive Chain Slack Adjustment
• Remove
  [B].
            the cotter pin [A], and loosen the rear axle nut

• Loosen   the both chain adjuster locknuts [C].
  If the chain is too loose, turn out the left and right chain
    adjusters [D] evenly.
    If the chain is too tight, turn in the left and right chain
    adjusters evenly, and kick the wheel forward.
•   Turn both chain adjusters evenly until the drive chain has
    the correct amount of slack. To keep the chain and wheel
    properly aligned, the notch [E] on the left wheel alignment
    indicator [F] should align with the same swingarm mark or
    position [G] that the right indicator notch aligns with.

                             WARNING
    Misalignment of the wheel will result in abnormal
    wear and may result in an unsafe riding condition.
    Be sure the wheel is properly aligned.

• Tighten the both chain adjuster locknuts securely.
• Tighten the rear axle nut.
    Torque - Rear Axle Nut: 110 N·m (11.2 kgf·m, 81.1 ft·lb)
• Turn the wheel, measure the chain slack again at the tight-
  est position, and readjust if necessary.

• Insert a new cotter pin [A].
                               NOTE
    ○When inserting the cotter pin, if the slots in the nut do
     not align with the cotter pin hole in the axle, tighten the
     nut clockwise [B] up to next alignment.
    ○It should be within 30 degrees.
    ○Loosen once and tighten again when the slot goes past
     the nearest hole.