Service Manual — page 365 of 715
Crankshaft/Transmission › Connecting Rod Installation
Text on this page
CRANKSHAFT/TRANSMISSION 9-19
Crankshaft and Connecting Rods

• Install new bolts and nuts in reused connecting rod.
  If the connecting rod assy was replaced, use the bolts and
    nuts attached to the new connecting rod assy.
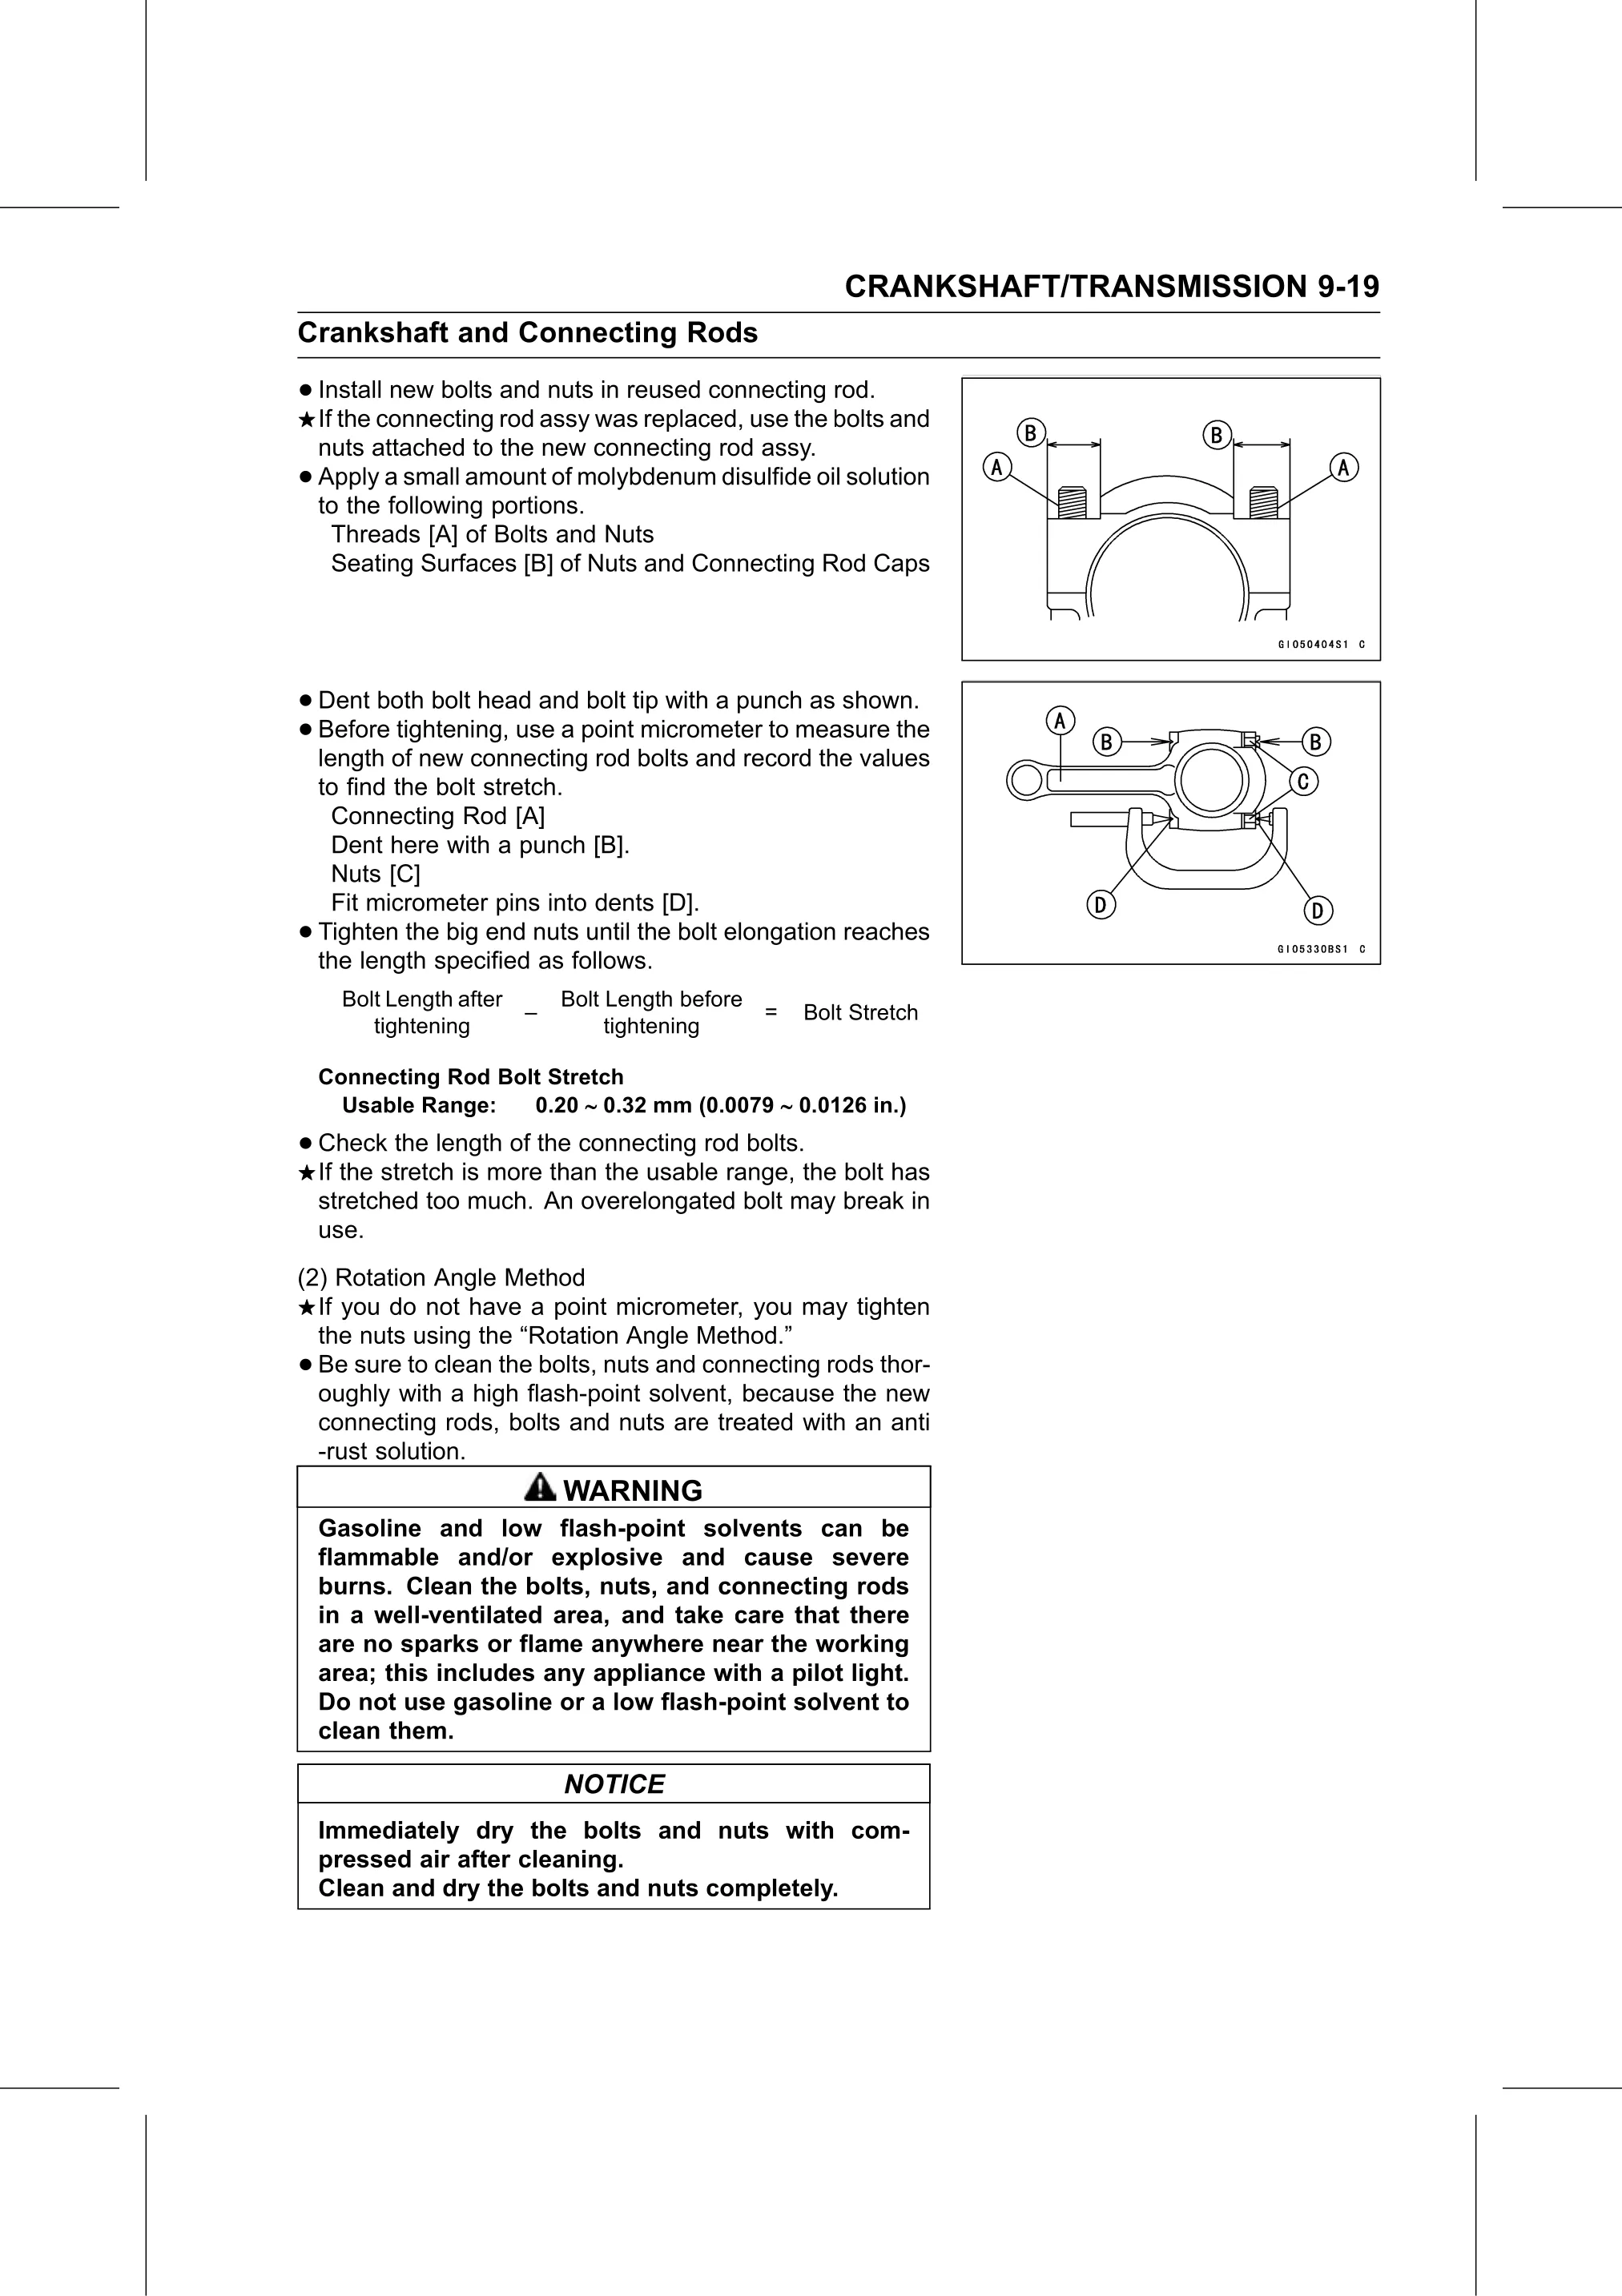
•   Apply a small amount of molybdenum disulfide oil solution
    to the following portions.
     Threads [A] of Bolts and Nuts
     Seating Surfaces [B] of Nuts and Connecting Rod Caps

• Dent both bolt head and bolt tip with a punch as shown.
• length oftightening,
  Before               use a point micrometer to measure the
              new connecting rod bolts and record the values
    to find the bolt stretch.
     Connecting Rod [A]
     Dent here with a punch [B].
     Nuts [C]
     Fit micrometer pins into dents [D].
•   Tighten the big end nuts until the bolt elongation reaches
    the length specified as follows.
      Bolt Length after       Bolt Length before
                          –                        =   Bolt Stretch
         tightening                tightening

    Connecting Rod Bolt Stretch
      Usable Range:   0.20 ∼ 0.32 mm (0.0079 ∼ 0.0126 in.)

• Check   the length of the connecting rod bolts.
  If the stretch is more than the usable range, the bolt has
    stretched too much. An overelongated bolt may break in
    use.
(2) Rotation Angle Method
  If you do not have a point micrometer, you may tighten
  the nuts using the “Rotation Angle Method.”
• Be sure to clean the bolts, nuts and connecting rods thor-
  oughly with a high flash-point solvent, because the new
  connecting rods, bolts and nuts are treated with an anti
  -rust solution.
                              WARNING
    Gasoline and low flash-point solvents can be
    flammable and/or explosive and cause severe
    burns. Clean the bolts, nuts, and connecting rods
    in a well-ventilated area, and take care that there
    are no sparks or flame anywhere near the working
    area; this includes any appliance with a pilot light.
    Do not use gasoline or a low flash-point solvent to
    clean them.

                              NOTICE
    Immediately dry the bolts and nuts with com-
    pressed air after cleaning.
    Clean and dry the bolts and nuts completely.