Service Manual — page 419 of 715
Final Drive › Coupling Installation
Text on this page
FINAL DRIVE 11-13
Sprocket, Coupling
Rear Sprocket Removal
• Remove  the rear wheel (see Rear Wheel Removal in the
  Wheels/Tires chapter).
                         NOTICE
 Do not lay the wheel on the ground with the disc
 facing down. This can damage or warp the disc.
 Place blocks under the wheel so that the disc does
 not touch the ground.

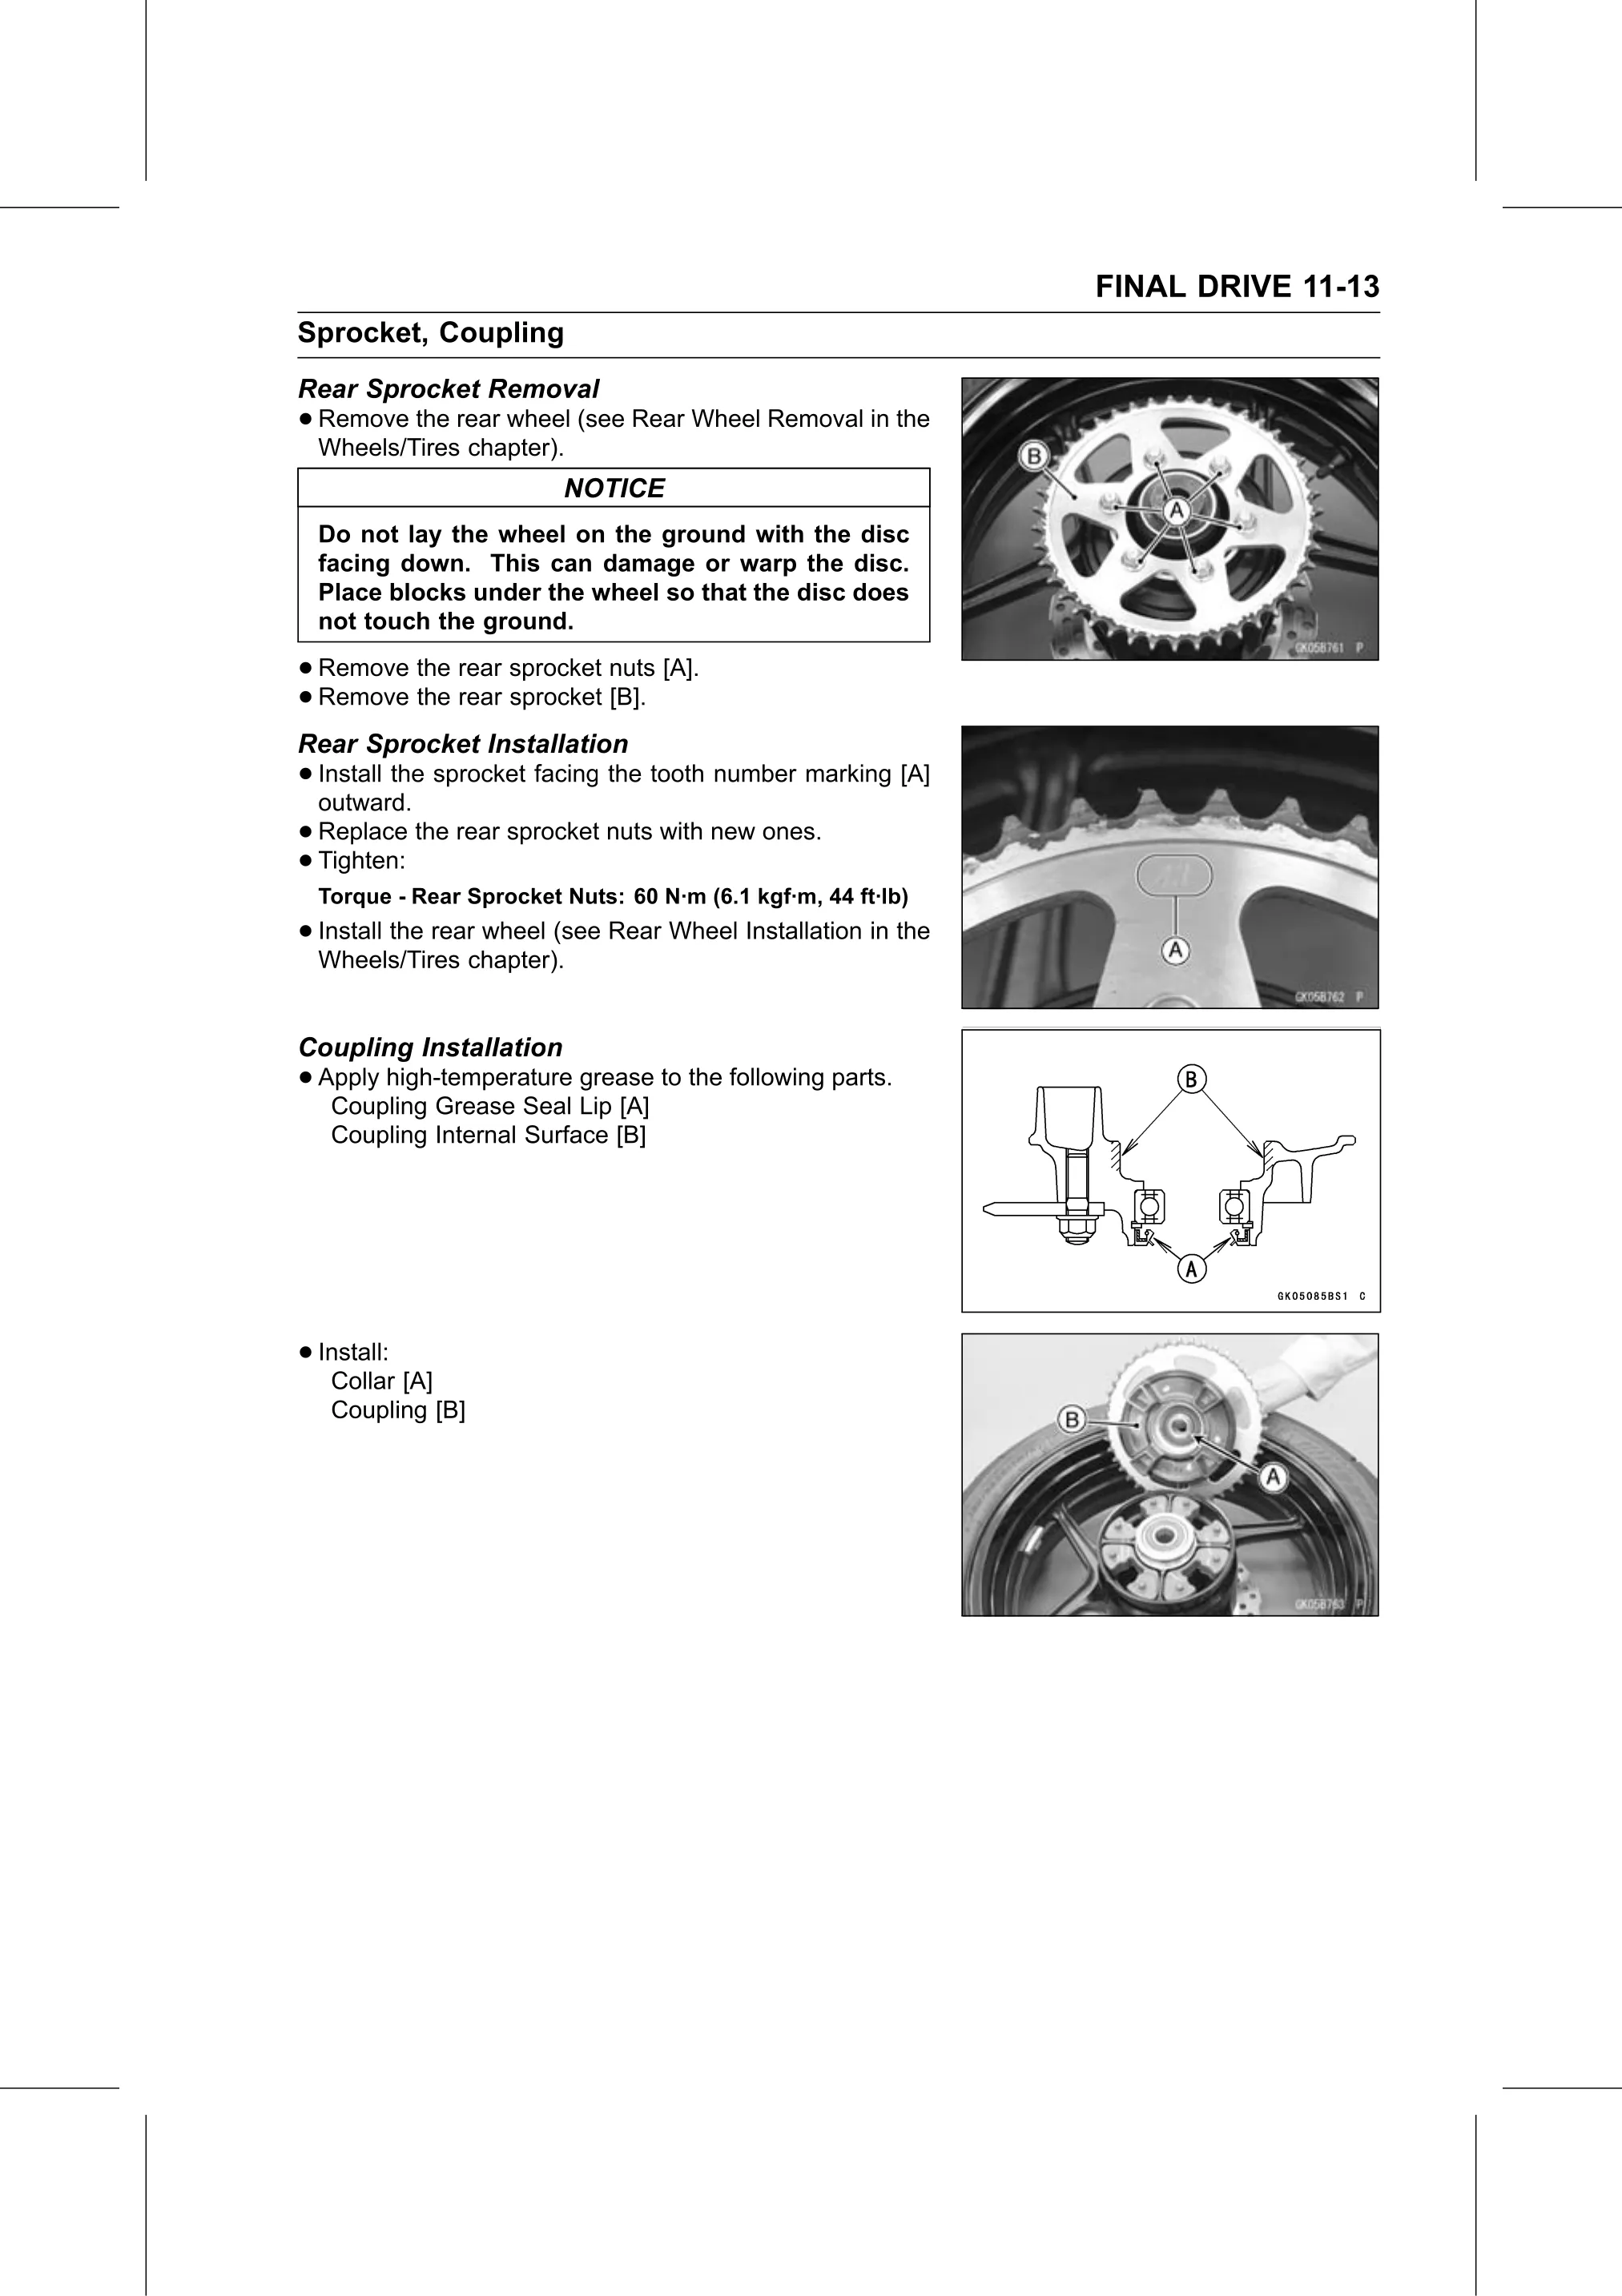
• Remove the rear sprocket nuts [A].
• Remove the rear sprocket [B].
Rear Sprocket Installation
• Install
  outward.
          the sprocket facing the tooth number marking [A]

• Replace   the rear sprocket nuts with new ones.
• Tighten:
 Torque - Rear Sprocket Nuts: 60 N·m (6.1 kgf·m, 44 ft·lb)
• Install the rear wheel (see Rear Wheel Installation in the
  Wheels/Tires chapter).

Coupling Installation
• Apply high-temperature grease to the following parts.
   Coupling Grease Seal Lip [A]
   Coupling Internal Surface [B]

• Install:
   Collar [A]
   Coupling [B]