Service Manual (KLZ1000C) — page 515 of 762
Electrical System › Alternator Rotor Removal
Text on this page
ELECTRICAL SYSTEM 16-33
Charging System
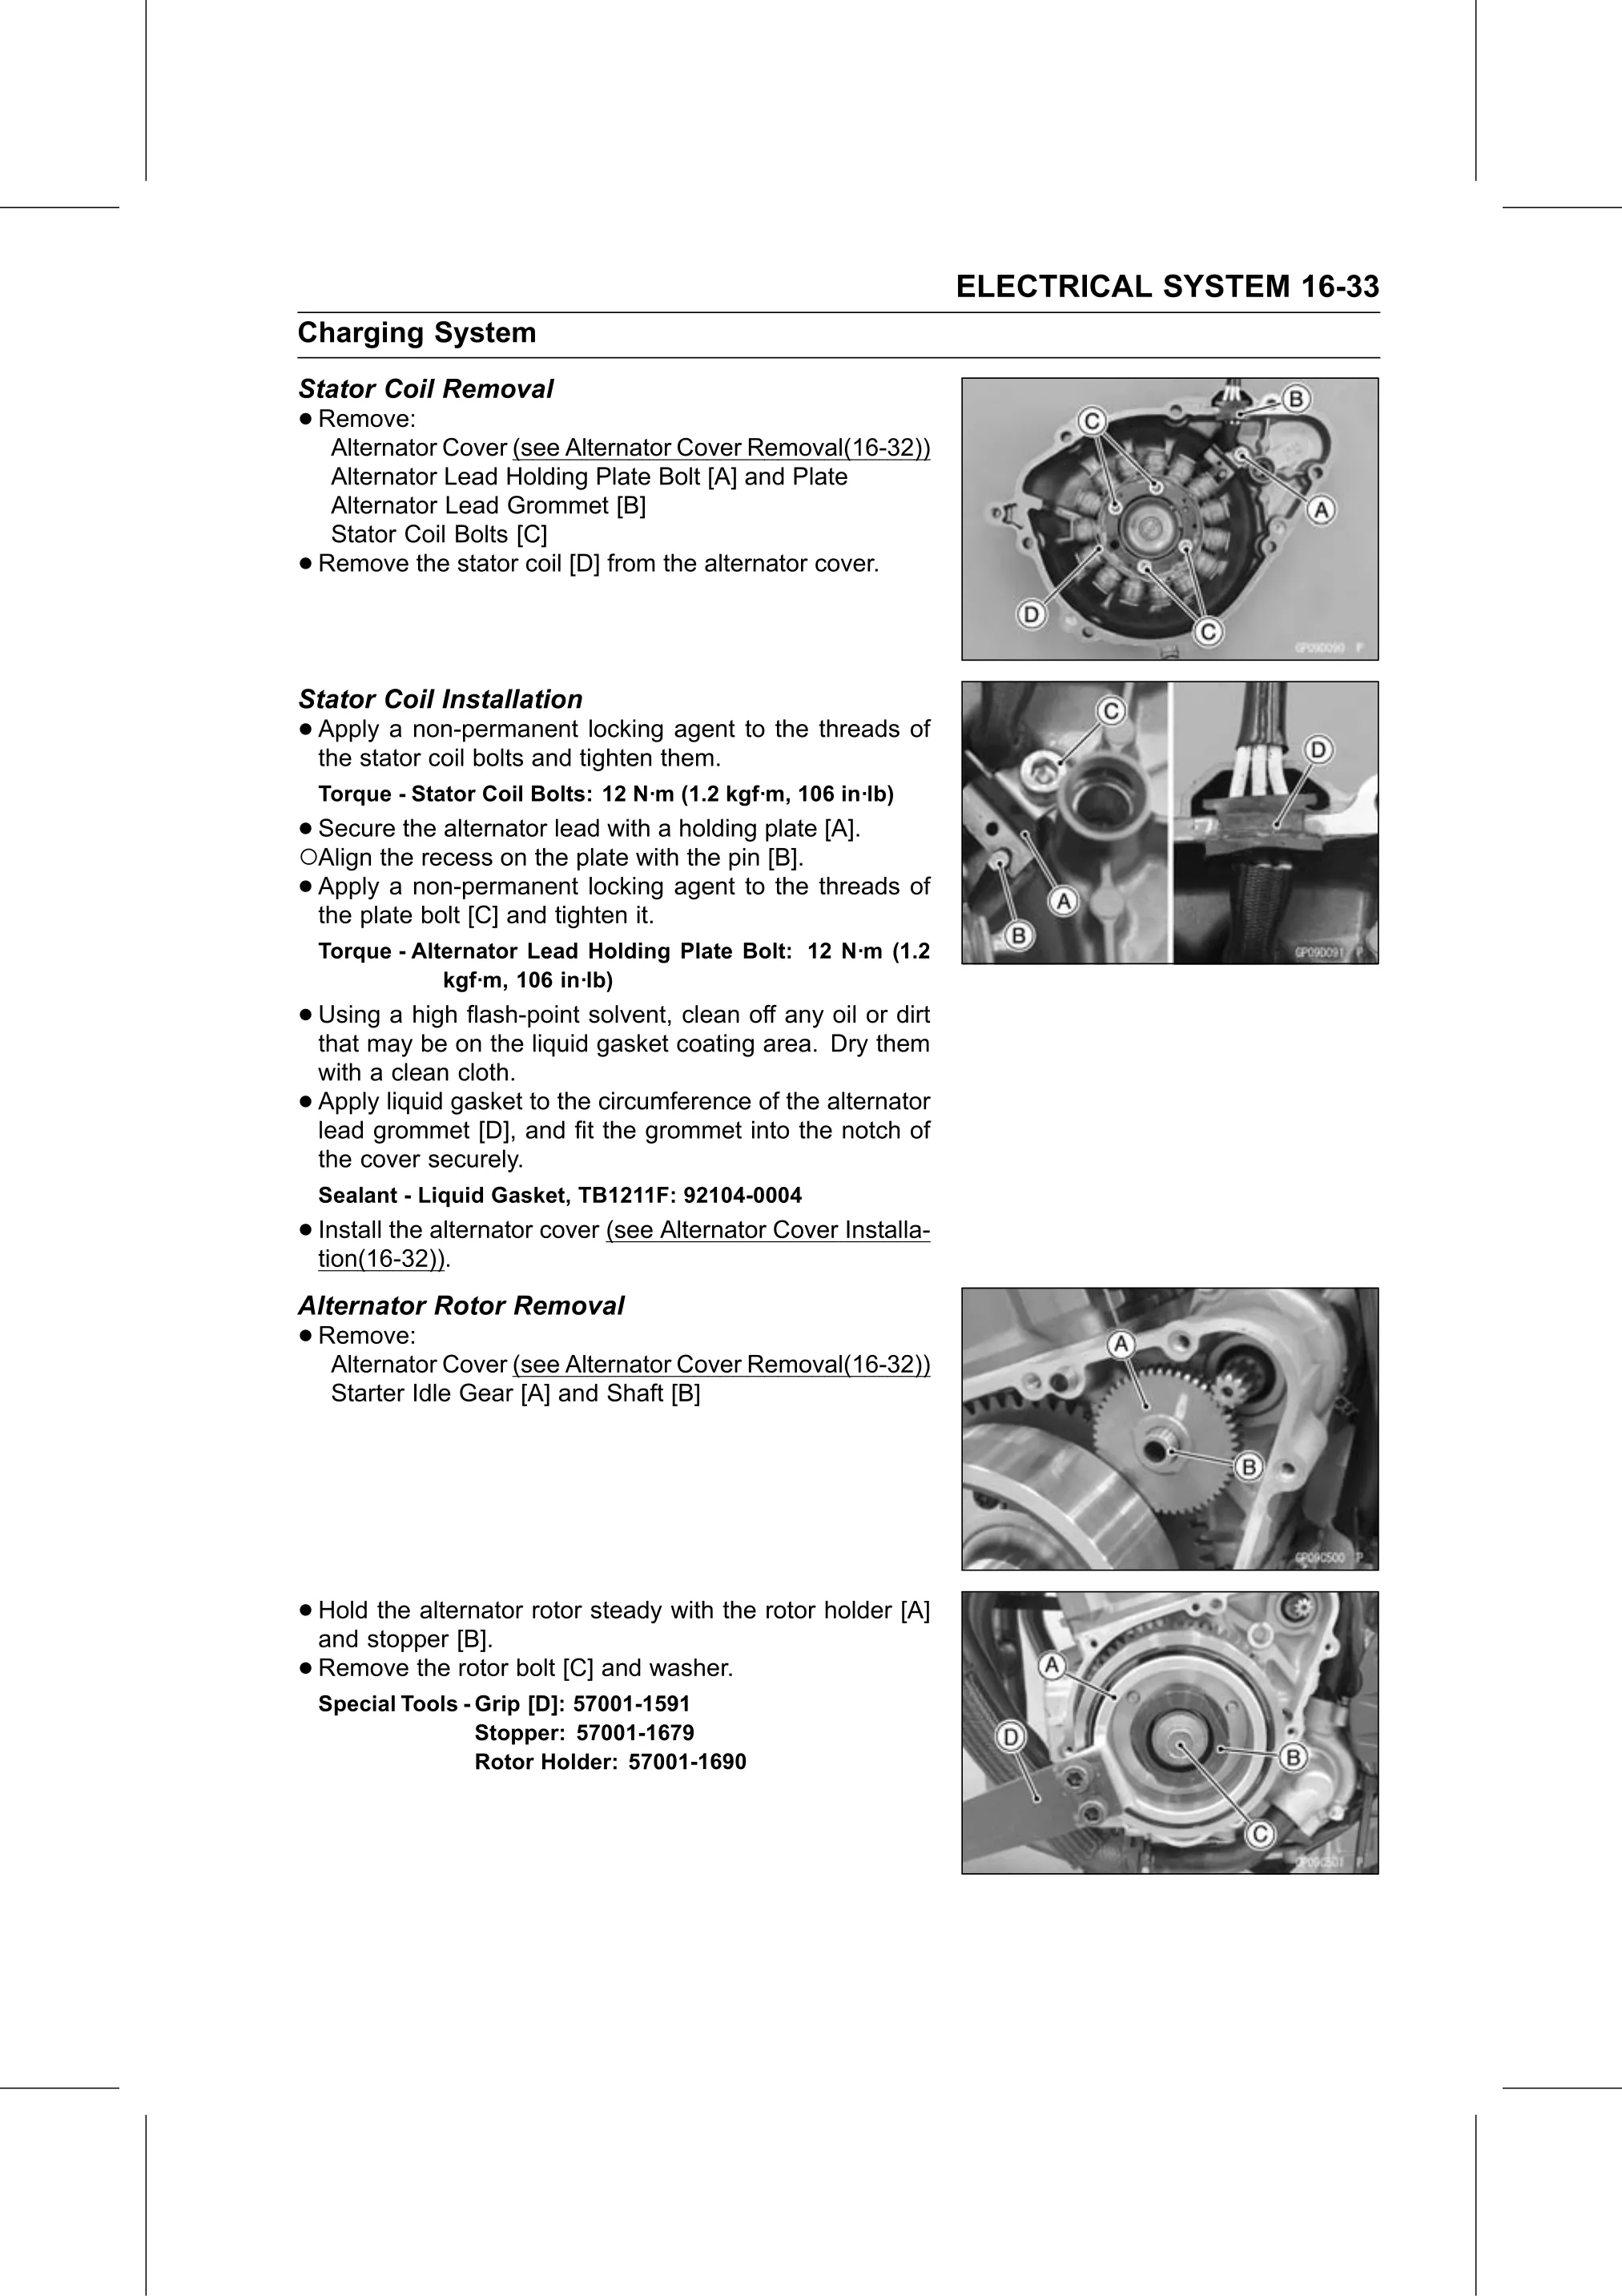
Stator Coil Removal
• Remove:
   Alternator Cover (see Alternator Cover Removal(16-32))
     Alternator Lead Holding Plate Bolt [A] and Plate
     Alternator Lead Grommet [B]
     Stator Coil Bolts [C]
•   Remove the stator coil [D] from the alternator cover.

Stator Coil Installation
• Apply  a non-permanent locking agent to the threads of
  the stator coil bolts and tighten them.
    Torque - Stator Coil Bolts: 12 N·m (1.2 kgf·m, 106 in·lb)
•○Secure   the alternator lead with a holding plate [A].
   Align the recess on the plate with the pin [B].
 • Apply  a non-permanent locking agent to the threads of
   the plate bolt [C] and tighten it.
    Torque - Alternator Lead Holding Plate Bolt: 12 N·m (1.2
                kgf·m, 106 in·lb)
• Using a high flash-point solvent, clean off any oil or dirt
  that may be on the liquid gasket coating area. Dry them
    with a clean cloth.
•   Apply liquid gasket to the circumference of the alternator
    lead grommet [D], and fit the grommet into the notch of
    the cover securely.
    Sealant - Liquid Gasket, TB1211F: 92104-0004
• Install the alternator cover (see Alternator Cover Installa-
  tion(16-32)).
Alternator Rotor Removal
• Remove:
   Alternator Cover (see Alternator Cover Removal(16-32))
     Starter Idle Gear [A] and Shaft [B]

• Hold the alternator rotor steady with the rotor holder [A]
  and stopper [B].
• Remove the rotor bolt [C] and washer.
    Special Tools - Grip [D]: 57001-1591
                    Stopper: 57001-1679
                    Rotor Holder: 57001-1690