Service Manual (KLZ1000C) — page 516 of 762
Electrical System › Alternator Rotor Installation
Text on this page
16-34 ELECTRICAL SYSTEM
Charging System
If using the rotor holder (57001-1757).
•  Hold the alternator rotor steady with the rotor holder [A].
•  Remove the rotor bolt [B] and washer.
    Special Tool - Rotor Holder: 57001-1757

• Using  the flywheel puller [A], remove the alternator rotor
  [B] from the crankshaft.
    Special Tool - Flywheel Puller Assembly, M38 × 1.5/M35 ×
                      1.5: 57001-1615

                           NOTICE
    Do not attempt to strike the alternator rotor itself.
    Striking the rotor can cause the magnets to lose
    their magnetism.

Alternator Rotor Installation
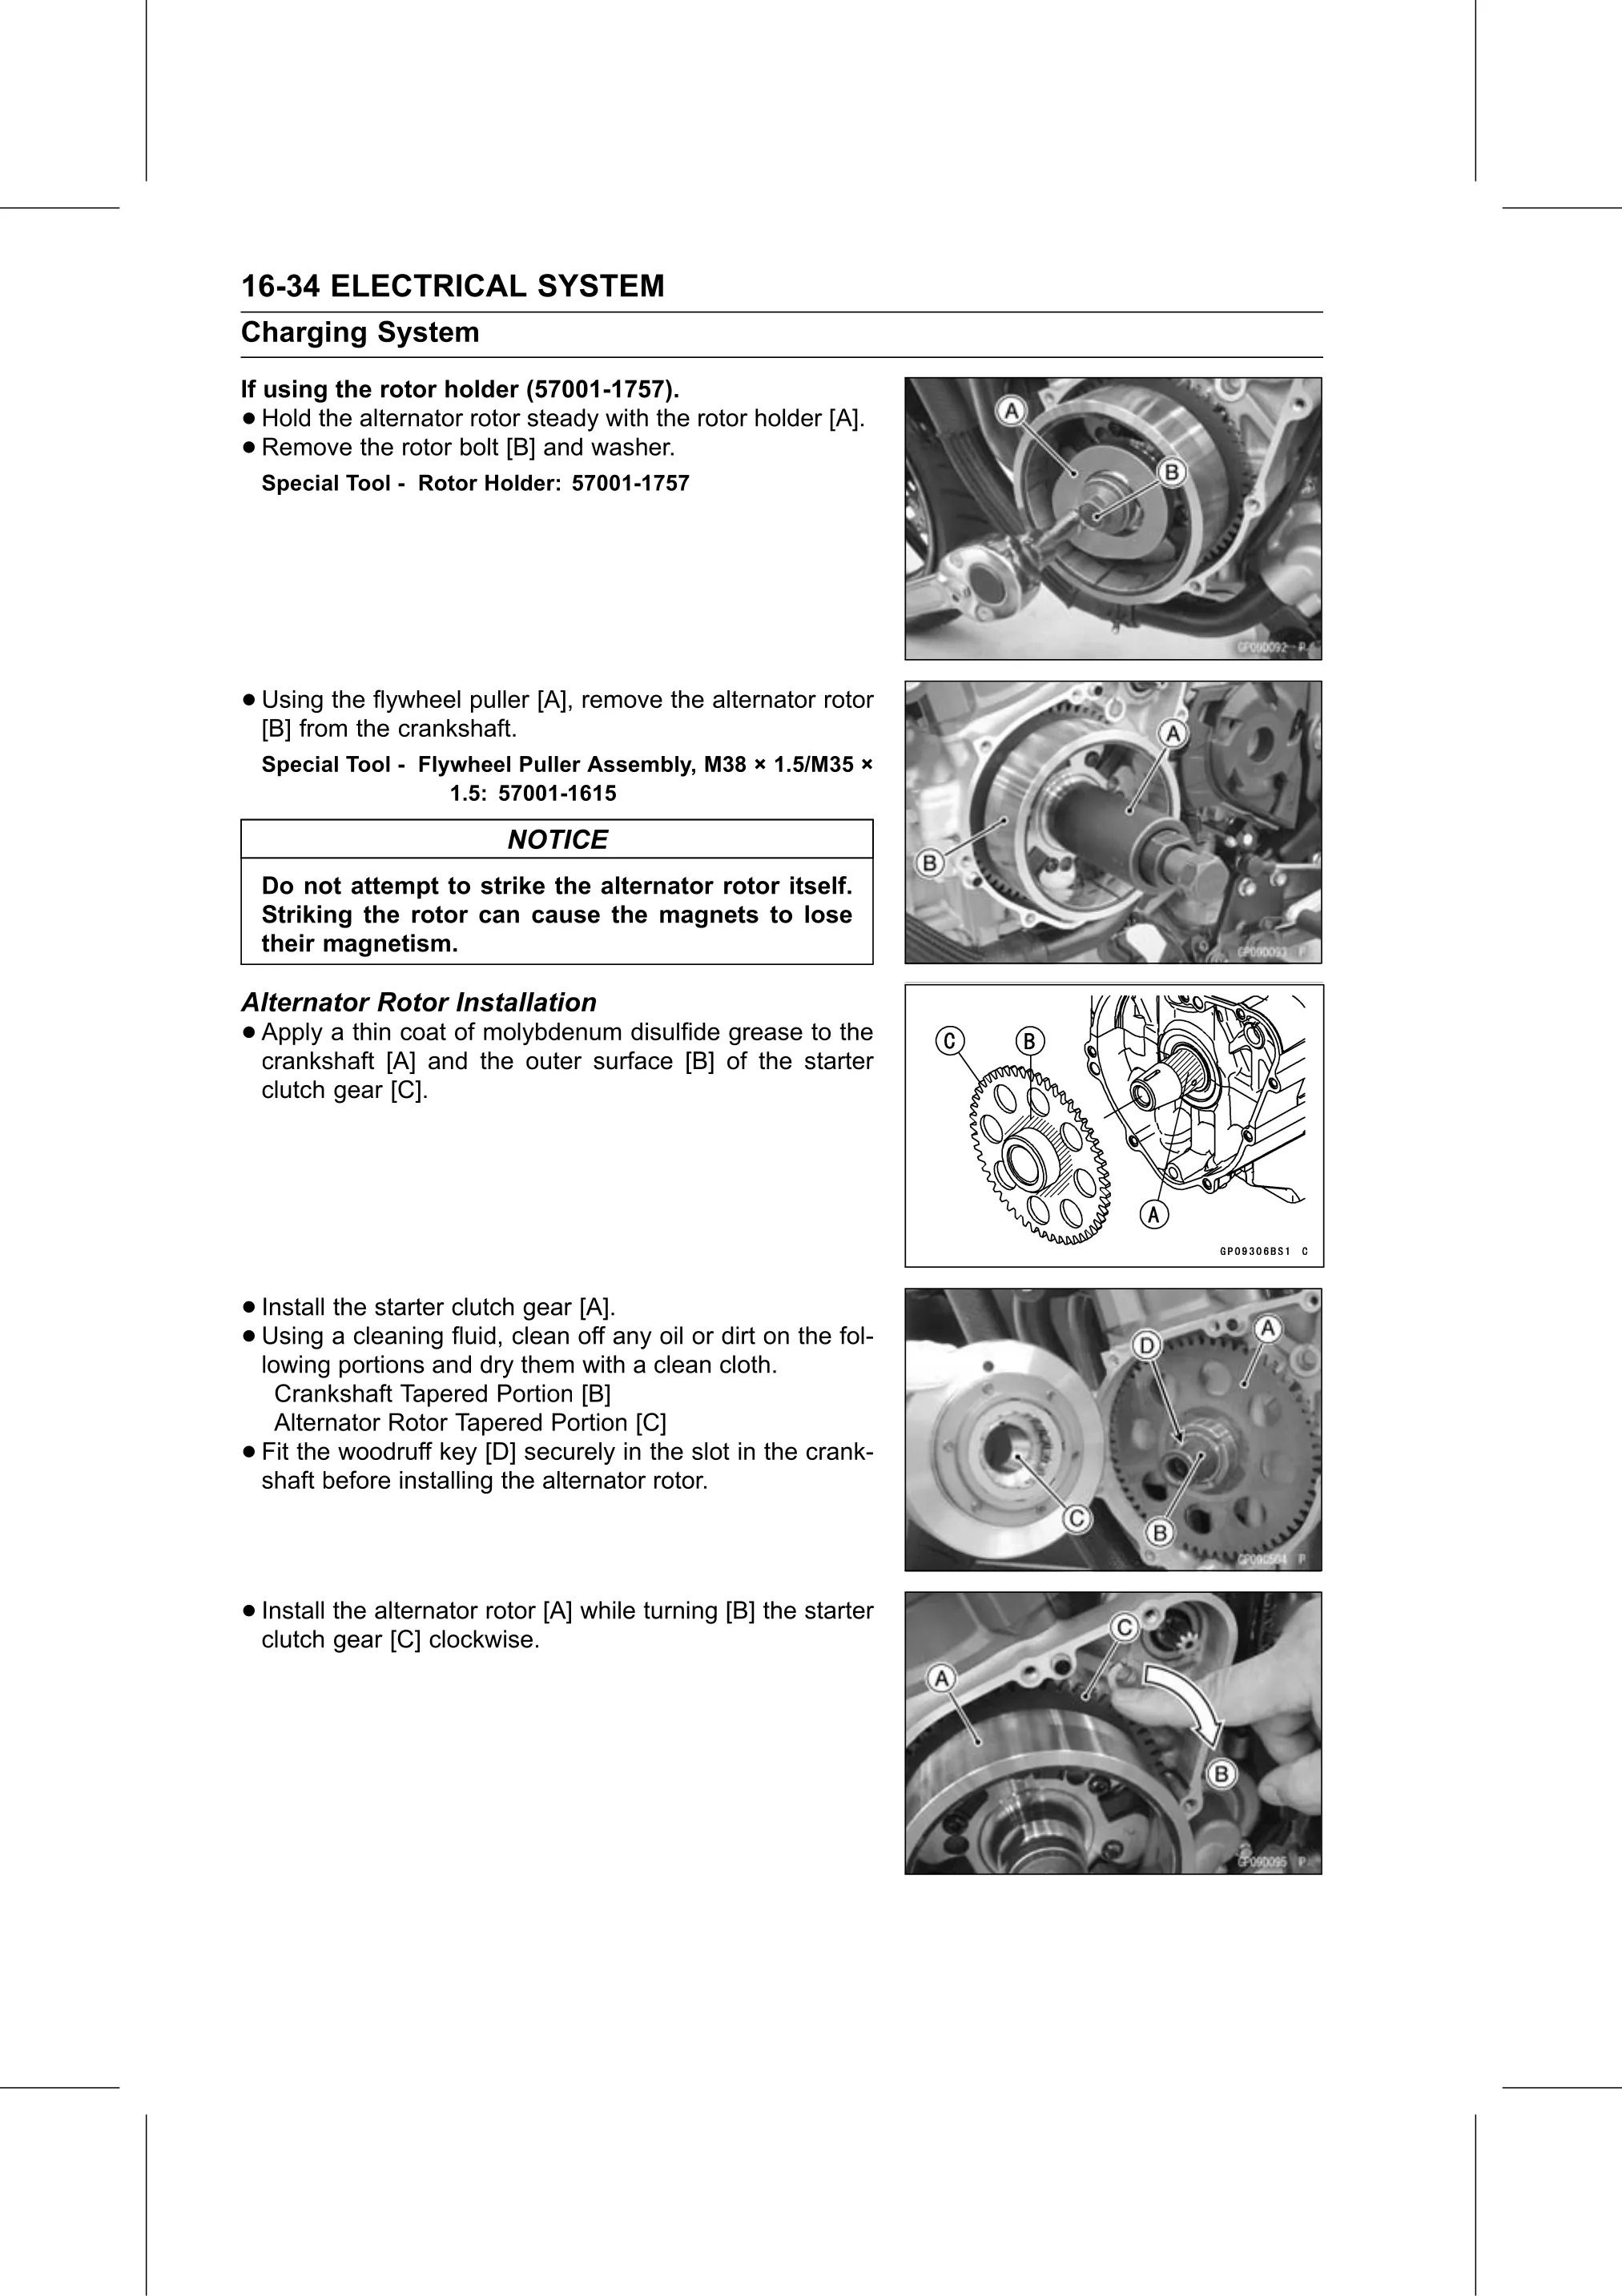
• Apply a thin coat of molybdenum disulfide grease to the
  crankshaft [A] and the outer surface [B] of the starter
    clutch gear [C].

• Install the starter clutch gear [A].
• Using   a cleaning fluid, clean off any oil or dirt on the fol-
  lowing portions and dry them with a clean cloth.
     Crankshaft Tapered Portion [B]
     Alternator Rotor Tapered Portion [C]
•   Fit the woodruff key [D] securely in the slot in the crank-
    shaft before installing the alternator rotor.

• Install the alternator rotor [A] while turning [B] the starter
  clutch gear [C] clockwise.