Service Manual — page 236 of 715
Cooling System › Coolant Reserve Tank Installation
Text on this page
4-10 COOLING SYSTEM
Coolant
Cooling System Flushing
  Over a period of time, the cooling system accumulates
rust, scale, and lime in the water jacket and radiator. When
this accumulation is suspected or observed, flush the cool-
ing system. If this accumulation is not removed, it will clog
up the water passage and considerable reduce the effi-
ciency of the cooling system.
• Drain the cooling system (see Coolant Change in the Pe-
  riodic Maintenance chapter).
• Fill the cooling system with fresh water mixed with a flush-
  ing compound.
                          NOTICE
    Do not use a flushing compound which is harmful to
    the aluminum engine and radiator. Carefully follow
    the instructions supplied by the manufacturer of the
    cleaning product.

• Warm     up the engine, and run it at normal operating tem-
  perature for about ten minutes.
• Stop   the engine, and drain the cooling system.
• Warm upsystem
  Fill the         with fresh water.
• Repeat the previous two
              the engine  and drain the system.
• Fill the system with a permanent
                              steps once more.
• the air from the system (see Coolant type coolant and bleed
                                          Change in the Peri-
    odic Maintenance chapter).
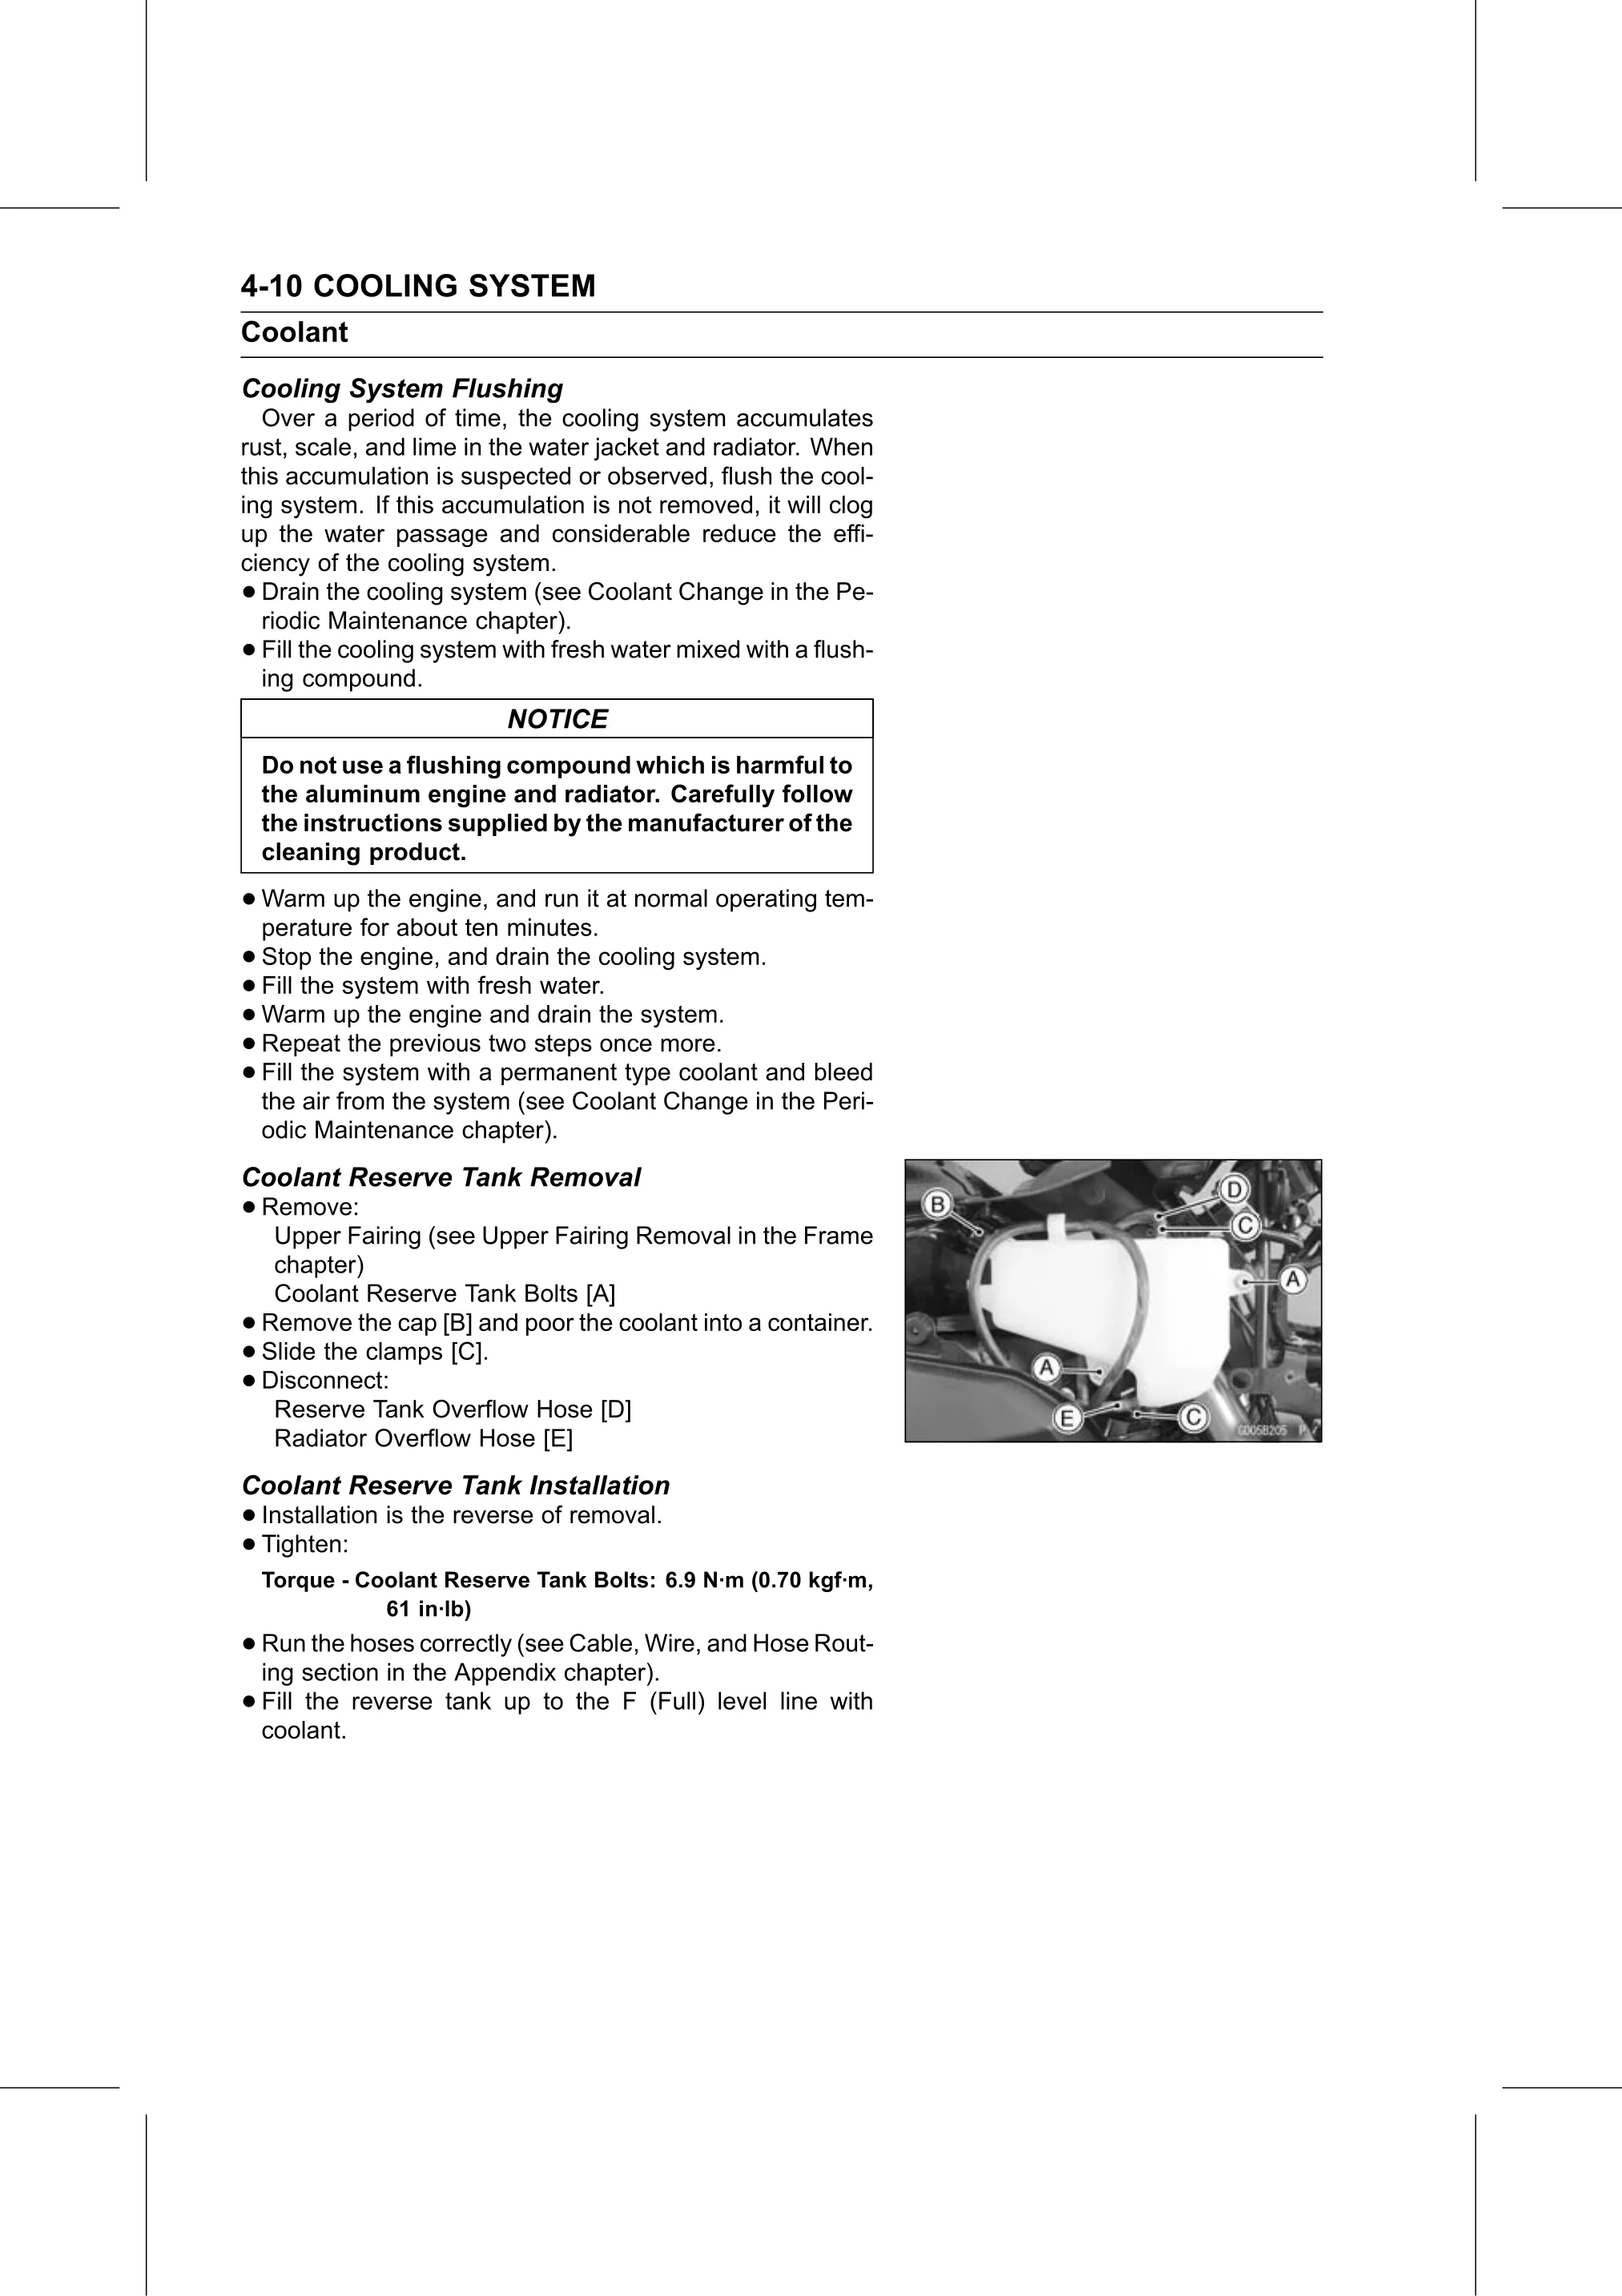
Coolant Reserve Tank Removal
• Remove:
   Upper Fairing (see Upper Fairing Removal in the Frame
     chapter)
     Coolant Reserve Tank Bolts [A]
•   Remove the cap [B] and poor the coolant into a container.
•   Slide the clamps [C].
•   Disconnect:
     Reserve Tank Overflow Hose [D]
     Radiator Overflow Hose [E]
Coolant Reserve Tank Installation
• Installation is the reverse of removal.
• Tighten:
    Torque - Coolant Reserve Tank Bolts: 6.9 N·m (0.70 kgf·m,
               61 in·lb)
• Run   the hoses correctly (see Cable, Wire, and Hose Rout-
  ing section in the Appendix chapter).
• Fill the reverse tank up to the F (Full) level line with
  coolant.