Service Manual — page 264 of 715
Engine Top End › Air Switching Valve Removal
Text on this page
5-14 ENGINE TOP END
Clean Air System
Air Suction Valve Inspection
• Remove
  moval).
            the air suction valve (see Air Suction Valve Re-

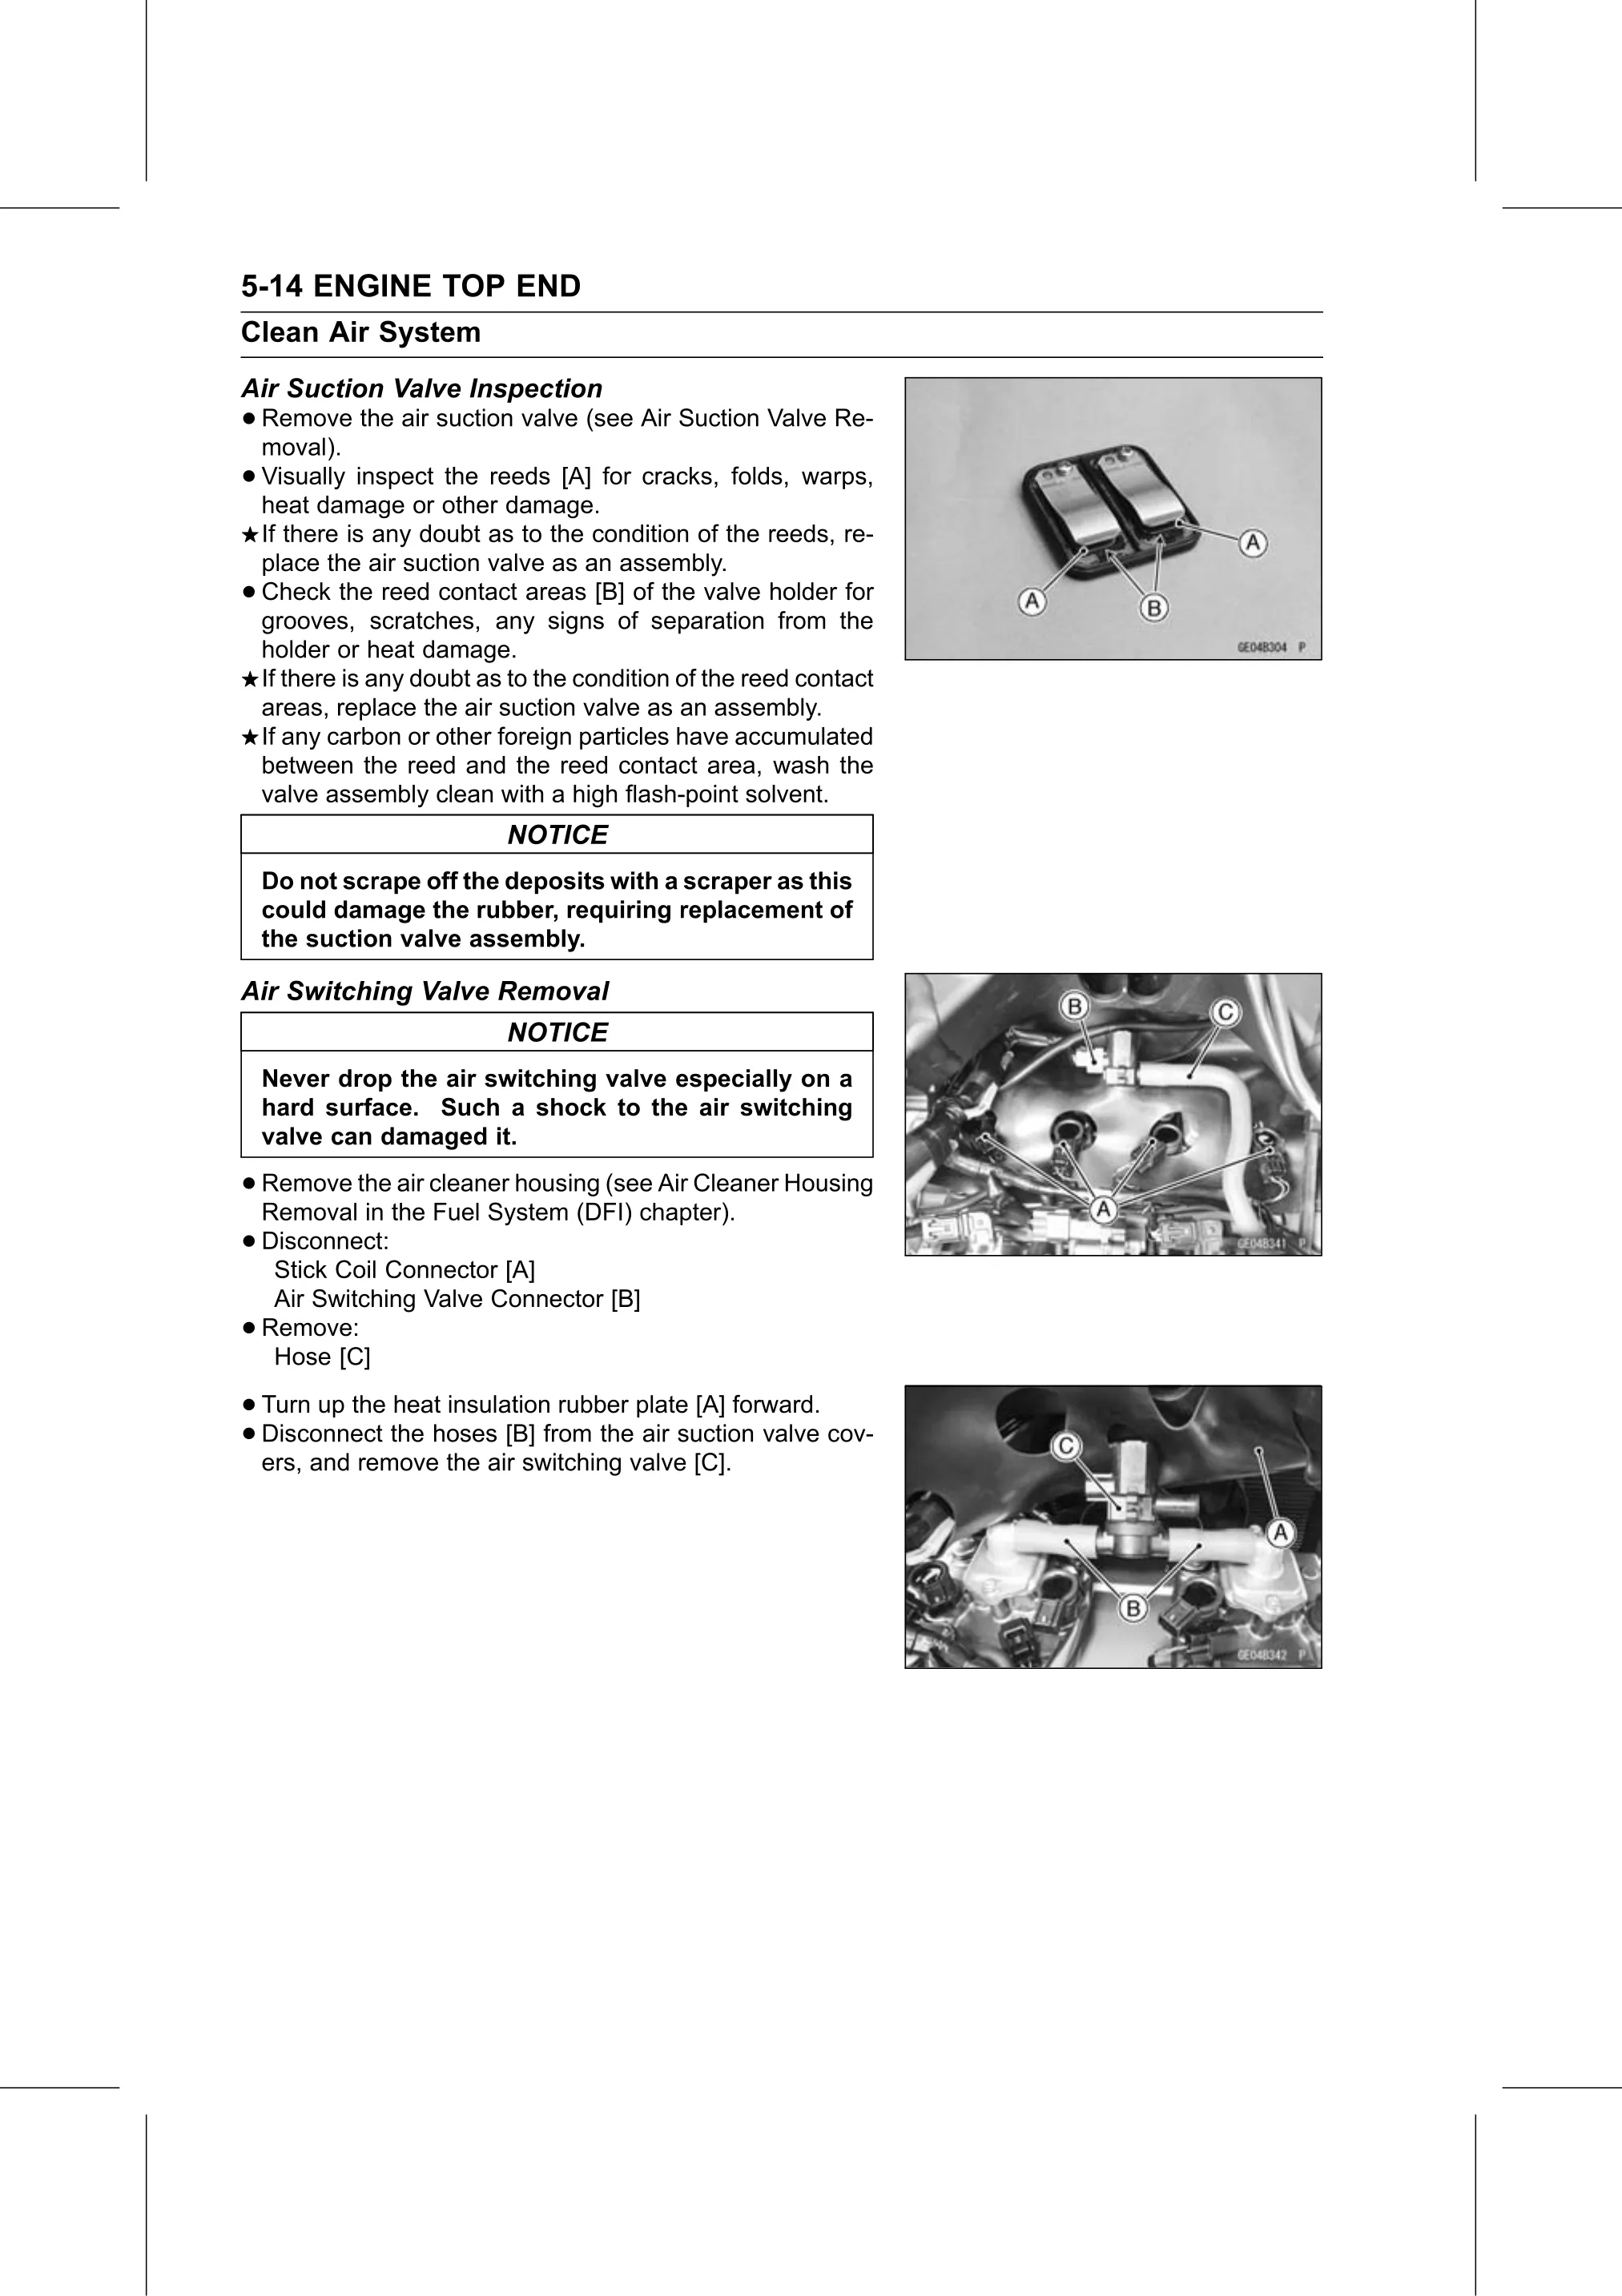
• Visually inspect the reeds [A] for cracks, folds, warps,
  heat damage or other damage.
    If there is any doubt as to the condition of the reeds, re-
    place the air suction valve as an assembly.
•   Check the reed contact areas [B] of the valve holder for
    grooves, scratches, any signs of separation from the
    holder or heat damage.
    If there is any doubt as to the condition of the reed contact
    areas, replace the air suction valve as an assembly.
    If any carbon or other foreign particles have accumulated
    between the reed and the reed contact area, wash the
    valve assembly clean with a high flash-point solvent.
                            NOTICE
    Do not scrape off the deposits with a scraper as this
    could damage the rubber, requiring replacement of
    the suction valve assembly.

Air Switching Valve Removal
                            NOTICE
    Never drop the air switching valve especially on a
    hard surface. Such a shock to the air switching
    valve can damaged it.

• Remove  the air cleaner housing (see Air Cleaner Housing
  Removal in the Fuel System (DFI) chapter).
• Disconnect:
   Stick Coil Connector [A]
     Air Switching Valve Connector [B]
•   Remove:
     Hose [C]

• Turn  up the heat insulation rubber plate [A] forward.
• Disconnect   the hoses [B] from the air suction valve cov-
  ers, and remove the air switching valve [C].