Service Manual (KLZ1000C) — page 80 of 762
Periodic Maintenance › Headlight Aiming Inspection
Text on this page
2-58 PERIODIC MAINTENANCE
Periodic Maintenance Procedures

• Set the dimmer switch to high beam position.
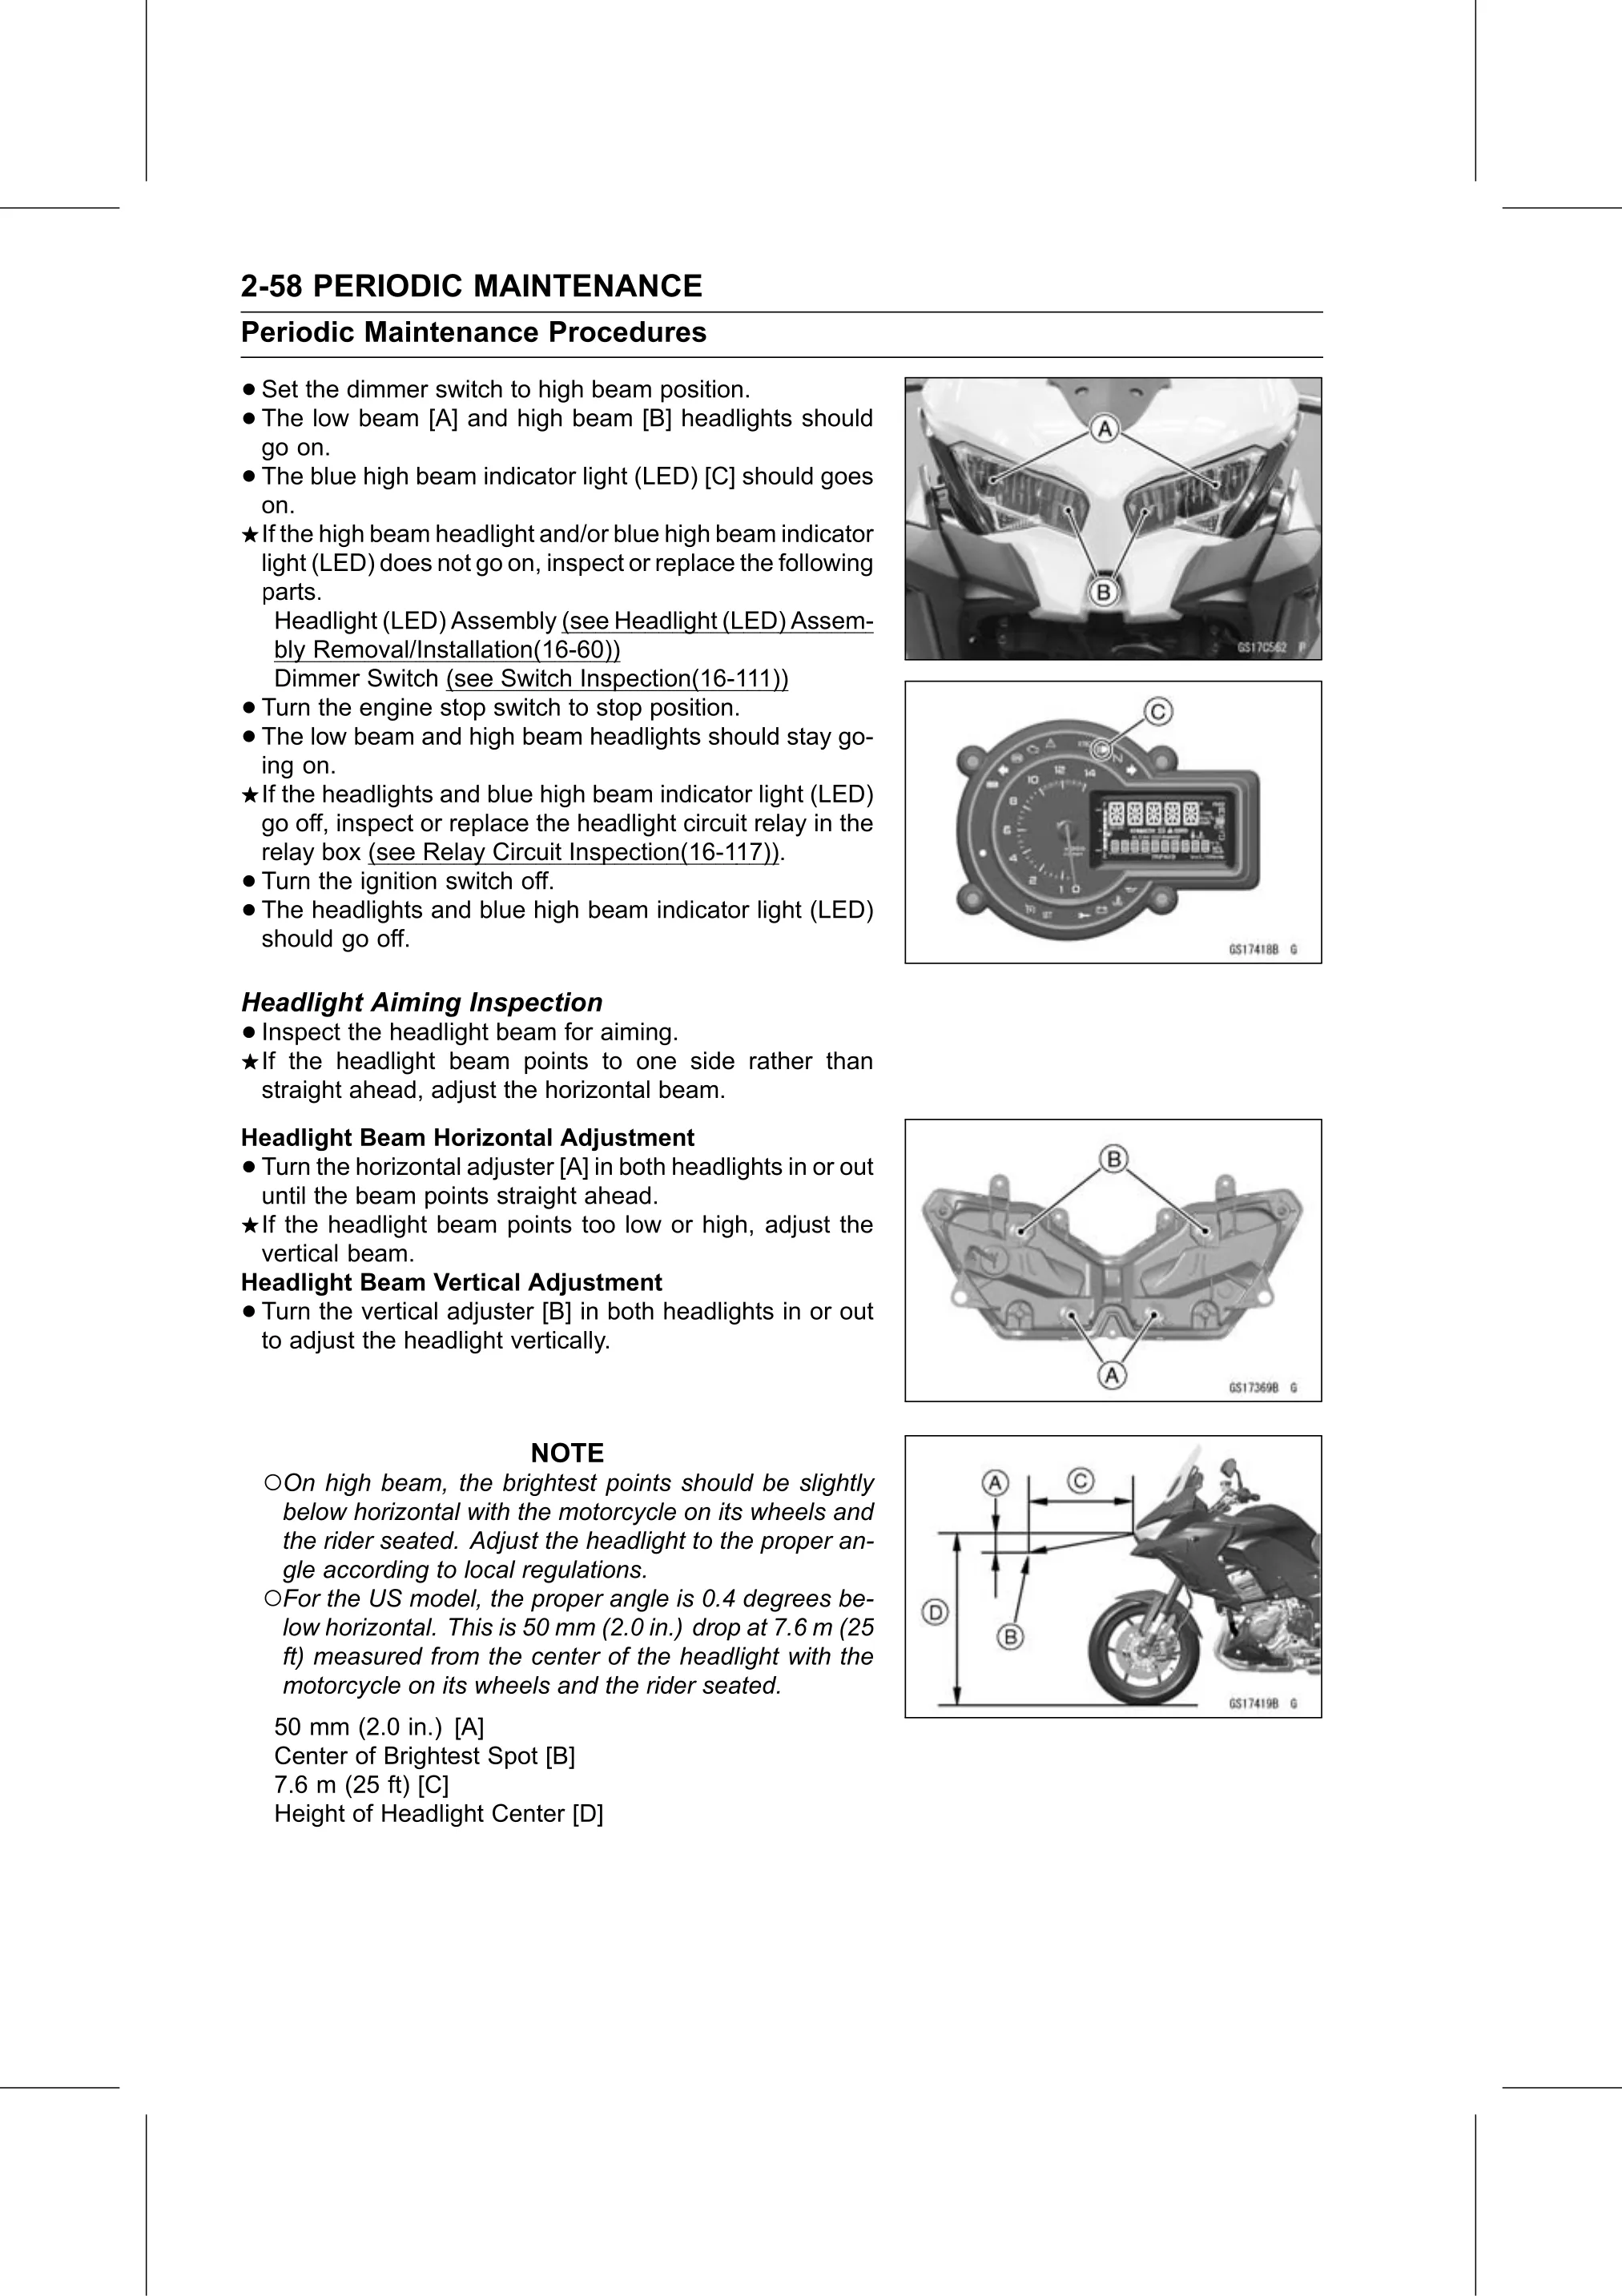
• go on.low beam [A] and high beam [B] headlights should
  The

• The
  on.
       blue high beam indicator light (LED) [C] should goes

    If the high beam headlight and/or blue high beam indicator
    light (LED) does not go on, inspect or replace the following
    parts.
      Headlight (LED) Assembly (see Headlight (LED) Assem-
      bly Removal/Installation(16-60))
      Dimmer Switch (see Switch Inspection(16-111))
•   Turn the engine stop switch to stop position.
•   The low beam and high beam headlights should stay go-
    ing on.
    If the headlights and blue high beam indicator light (LED)
    go off, inspect or replace the headlight circuit relay in the
    relay box (see Relay Circuit Inspection(16-117)).
•   Turn the ignition switch off.
•   The headlights and blue high beam indicator light (LED)
    should go off.

Headlight Aiming Inspection
• Inspect the headlight beam for aiming.
  If the headlight beam points to one side rather than
    straight ahead, adjust the horizontal beam.
Headlight Beam Horizontal Adjustment
•Turn the horizontal adjuster [A] in both headlights in or out
 until the beam points straight ahead.
 If the headlight beam points too low or high, adjust the
 vertical beam.
Headlight Beam Vertical Adjustment
•Turn the vertical adjuster [B] in both headlights in or out
 to adjust the headlight vertically.

                              NOTE
    ○On high beam, the brightest points should be slightly
     below horizontal with the motorcycle on its wheels and
     the rider seated. Adjust the headlight to the proper an-
     gle according to local regulations.
    ○For the US model, the proper angle is 0.4 degrees be-
     low horizontal. This is 50 mm (2.0 in.) drop at 7.6 m (25
     ft) measured from the center of the headlight with the
     motorcycle on its wheels and the rider seated.
     50 mm (2.0 in.) [A]
     Center of Brightest Spot [B]
     7.6 m (25 ft) [C]
     Height of Headlight Center [D]