Service Manual — page 397 of 715
Wheels/Tires › Rear Wheel Installation
Text on this page
WHEELS/TIRES 10-9
Wheels (Rims)

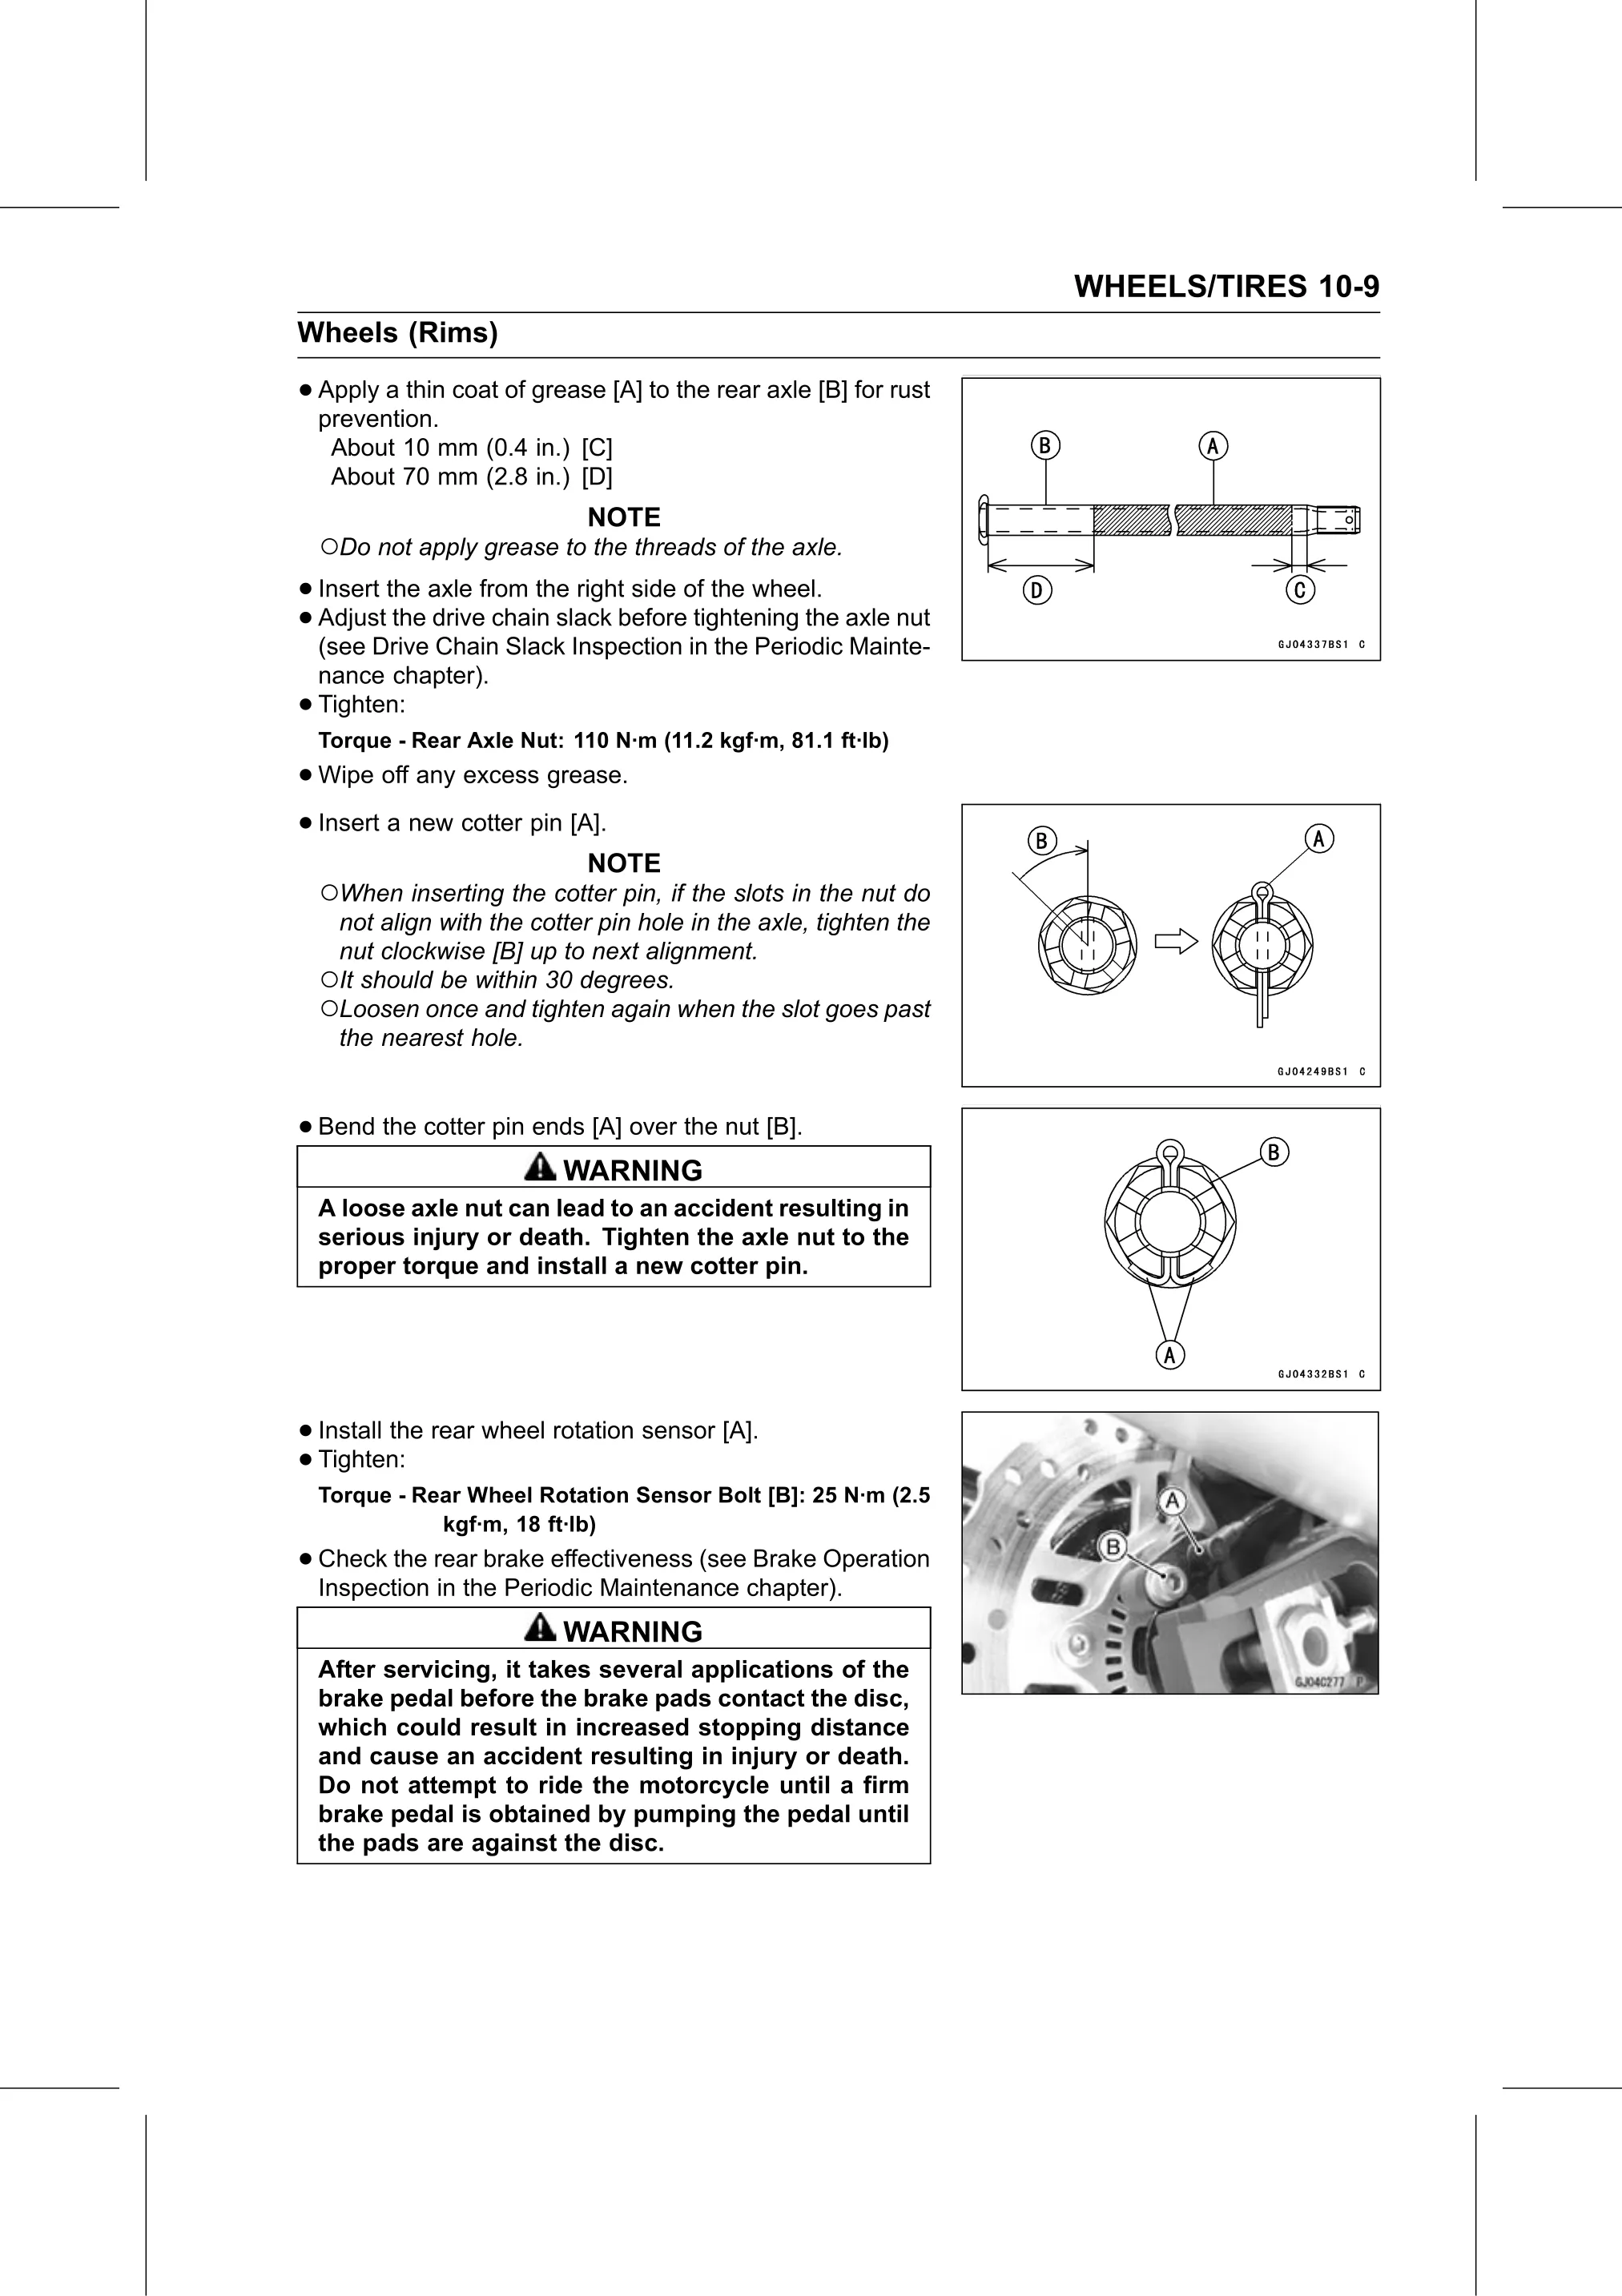
• Apply a thin coat of grease [A] to the rear axle [B] for rust
  prevention.
     About 10 mm (0.4 in.) [C]
     About 70 mm (2.8 in.) [D]
                              NOTE
    ○Do not apply grease to the threads of the axle.
• Insert the axle from the right side of the wheel.
• (see Drive
  Adjust  the drive chain slack before tightening the axle nut
              Chain Slack Inspection in the Periodic Mainte-
    nance chapter).
•   Tighten:
    Torque - Rear Axle Nut: 110 N·m (11.2 kgf·m, 81.1 ft·lb)
• Wipe off any excess grease.
• Insert a new cotter pin [A].
                              NOTE
    ○When inserting the cotter pin, if the slots in the nut do
     not align with the cotter pin hole in the axle, tighten the
     nut clockwise [B] up to next alignment.
    ○It should be within 30 degrees.
    ○Loosen once and tighten again when the slot goes past
     the nearest hole.

• Bend the cotter pin ends [A] over the nut [B].
                            WARNING
    A loose axle nut can lead to an accident resulting in
    serious injury or death. Tighten the axle nut to the
    proper torque and install a new cotter pin.

• Install the rear wheel rotation sensor [A].
• Tighten:
    Torque - Rear Wheel Rotation Sensor Bolt [B]: 25 N·m (2.5
               kgf·m, 18 ft·lb)
• Check the rear brake effectiveness (see Brake Operation
  Inspection in the Periodic Maintenance chapter).
                            WARNING
    After servicing, it takes several applications of the
    brake pedal before the brake pads contact the disc,
    which could result in increased stopping distance
    and cause an accident resulting in injury or death.
    Do not attempt to ride the motorcycle until a firm
    brake pedal is obtained by pumping the pedal until
    the pads are against the disc.